인기 검색 계정


Tasty Japan-人気No.1簡単料理・幸せレシピ(@tastyjapan) 인스타그램 상세 프로필 분석: 팔로워 7,426,173, 참여율 0.03%

@tastyjapan
인증됨Tasty Japan-人気No.1簡単料理・幸せレシピ
【フォロワー数 世界No.1料理動画】 「見て幸せ、作って楽しい」そんな”食”に関する動画をお届けする、Tasty日本版です🍳
https://www.buzzfeed.com/jp/badge/tastyjapan@tastyjapan님과 연관된 프로필


@tastyjapan 계정 통계 차트
게시물 타입 분포
시간대별 활동 분석 (최근 게시물 기준)
@tastyjapan 최근 게시물 상세 분석
동영상 게시물 분석
@tastyjapan 최근 게시물
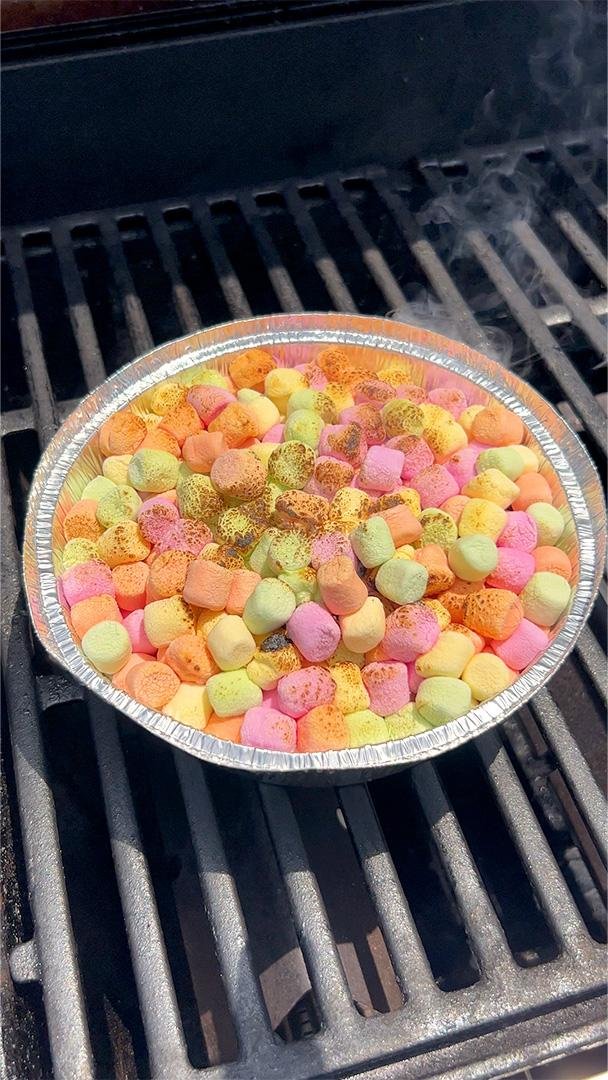
【BBQでマシュマロ、まだ焼くだけ?】チョコとベリーがとろ〜り♡ 肉より先になくなる絶品スイーツ / Berry S'more Dip @tastyjapan 👈他のレシピもチェック! 2〜3人分 材料: チョコチップ 300g ミックスベリー 100g マシュマロ 300g 作り方: ① アルミプレートにチョコチップの半量を広げ、中央にミックスベリーをのせる。残りのチョコチップを全体に散らし、マシュマロを隙間なく敷き詰める。 ② BBQの網にのせ、アルミホイルをふんわりとかぶせて中火で約5〜10分加熱する。バーナーで表面をあぶったら、完成! お好みでビスケットなどにつけて召し上がれ! 作ってみたことがある方、レシピ発案者の方、ぜひコメントで教えてください🙌 === Berry S'more Dip Servings: 2 to 3 INGREDIENTS 300g chocolate chips 100g mixed berries 300g marshmallows PREPARATION 1. Spread half of the chocolate chips on a baking tray. Arrange the berries in the center. Add the rest of the chocolate chips. Put the marshmallow on top. 2. Place the tray (1) on the BBQ grill. Cover the try with a foil. Cook for 5 to 10 minutes over medium heat. With a torch, burn the top to golden brown. Serve with biscuits. 3. Enjoy! Comment us if you have made this before or you are the one who invented this recipe! @craftvillage_nishikoyama 撮影協力: 目黒BBQテラス in クラフトビレッジ西小山 住所: 東京都目黒区原町1-7-8 #tastyjapan #スモア #BBQ #marshmallow
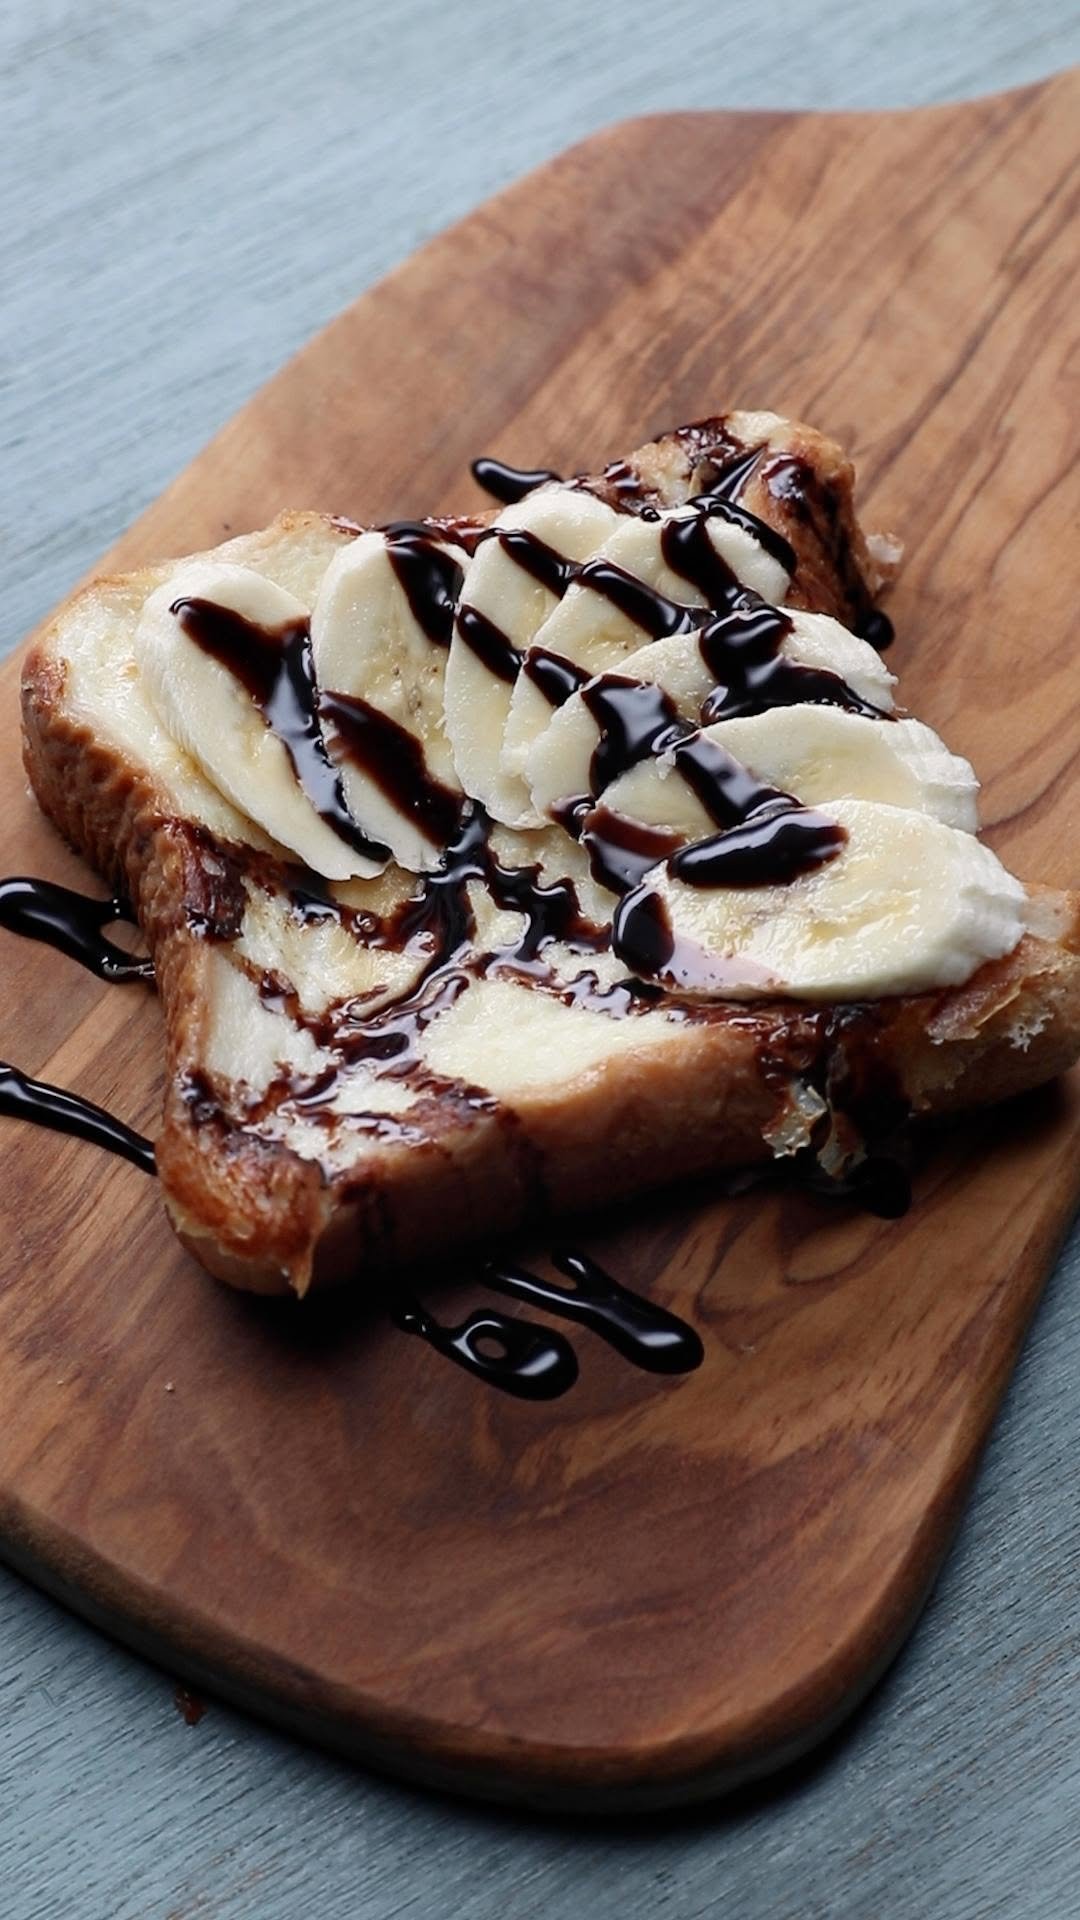
【染み込ませるだけ!】ミルクパン / Milk Toast @tastyjapan 👈他のレシピもチェック! 1枚分 材料: 食パン 1枚 牛乳 80ml バター 10g バナナ 適量 チョコレートソース 適量 作り方: ① フライパンに食パンと牛乳を入れて火にかける。 ② ①にバターを溶かし、牛乳の水分がなくなるまで両面こんがり焼く。 ③ ②に薄切りしたバナナをのせ、チョコレートシロップをかけたら、完成! === Milk Toast Servings: 1 INGREDIENTS 1 slice bread 80ml milk 10g butter Bananas, as needed Chocolate sauce, as needed PREPARATION 1. Place the bread in a pan. Add the milk and heat the pan. 2. Add the butter into the pan and simmer. Cook both sides of the bread until browned. 3. Place sliced bananas. Add some chocolate syrup. 4. Enjoy! #tastyjapan #食パン #トースト #おやつ

【きゅうり、このためにまとめ買い】入れて振るだけ。この味付けは大優勝 / Cucumber Salad @tastyjapan 👈他のレシピもチェック! 2人分 材料: きゅうり 2本 アボカド(1cm弱の角切り) 1/2個 【A】白菜キムチ 200g 【A】マグロ油漬け(油を切る) 1缶 【A】クリームチーズ 30g 【A】しょうゆ 小さじ1 【A】ごま油 小さじ1 作り方: ① きゅうりは輪切りにする。 ② 容器に①とアボカド、【A】を入れてふたをし、全体が混ざるまで振ったら、完成! 作ってみたことがある方、レシピ発案者の方、ぜひコメントで教えてください! === Cucumber Salad Servings: 2 INGREDIENTS 2 cucumbers 1/2 avocado (cut into 1cm pieces) [A] 200g nappa cabbage kimchi 1 canned tuna (drain oil) 30g cream cheese 1 teaspoon soy sauce 1 teaspoon sesame oil PREPARATION 1. Slice the cucumbers into a container. 2. Put (1), the avocado and all of the ingredients A into the container (1). Shake until everything is well combined. 3. Enjoy! Comment us if you have made this before or you are the one who invented this recipe! #tastyjapan #きゅうり #cucumber #簡単レシピ
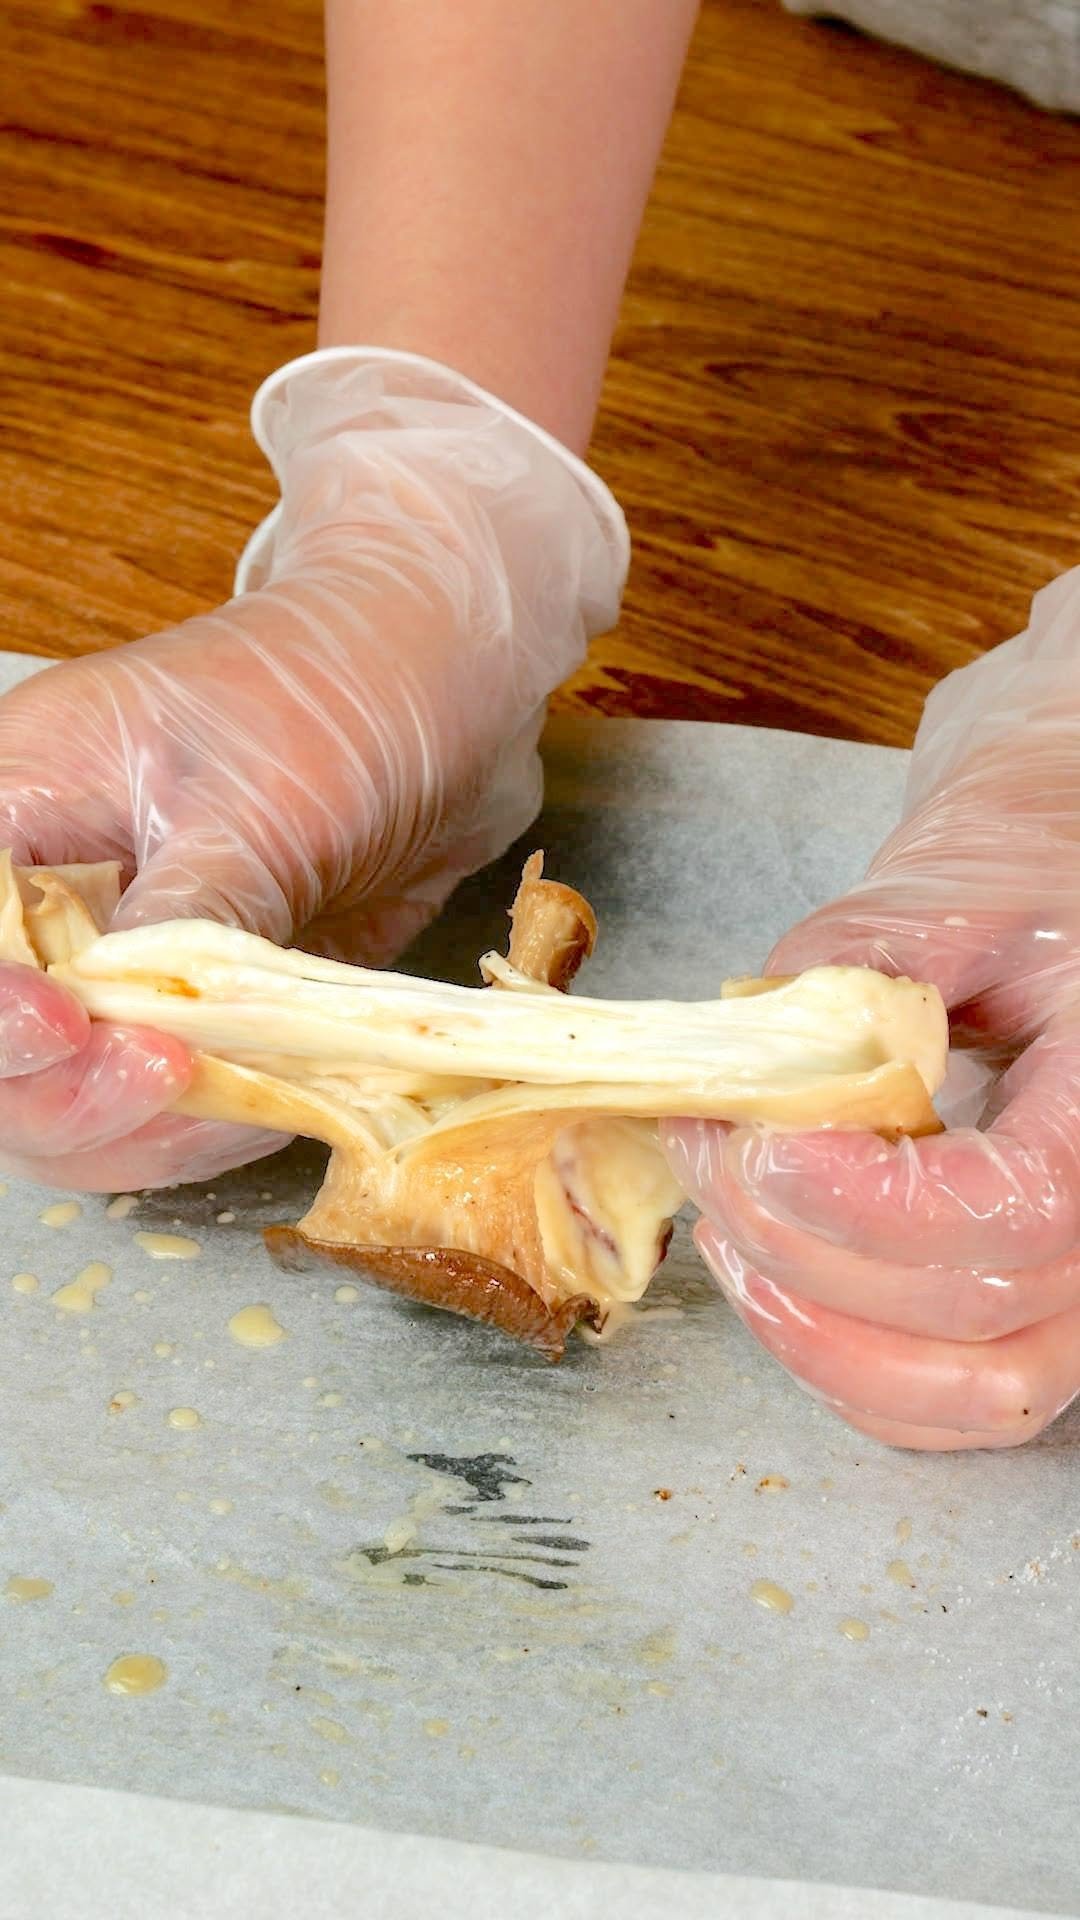
【韓国でバズってるチーズエリンギって知ってる?】エリンギの中にチーズを詰めるだけ!簡単でおいしいレシピ / Cheese Eryngii Mushrooms @tastyjapan 👈他のレシピもチェック! 2人分 材料: エリンギ 2本 ピザ用チーズ 適量 塩 小さじ1/3 黒コショウ 適量 作り方: ① エリンギの軸に包丁、スプーンを使って穴を空ける。 ② ①の穴にピザ用チーズを入れる。 ③ クッキングシートを敷いた天板に②を並べ、塩、黒コショウを振る。 ④ 200℃に予熱したオーブンで15分焼いたら、完成! くり抜いたエリンギの軸は、炒めて食べてください! ※クッキングシートは200℃で15分調理できるものを使用してください。 === Cheese Eryngii Mushrooms Servings: 2 INGREDIENTS 2 eryngii mushrooms Shredded cheese, as needed 1/3 teaspoon salt Black pepper, as needed PREPARATION 1. With a knife and a spoon, hollow out the stem of mushrooms. 2. Put the cheese in (1). 3. Place the mushrooms (2) on a baking tray lined with parchment paper. Season with salt and pepper. 4. Bake in the oven (preheated to 200°C/ 392°F) for 15 minutes. 5. Enjoy! *You may stir-fry and enjoy leftover stems (hollowed out) as well. *The parchment paper you use in this recipe needs to be heat-resistant for 200°C/392°F for 15 minutes or more. #tastyjapan #cheeseeryngiimushrooms #チーズエリンギ
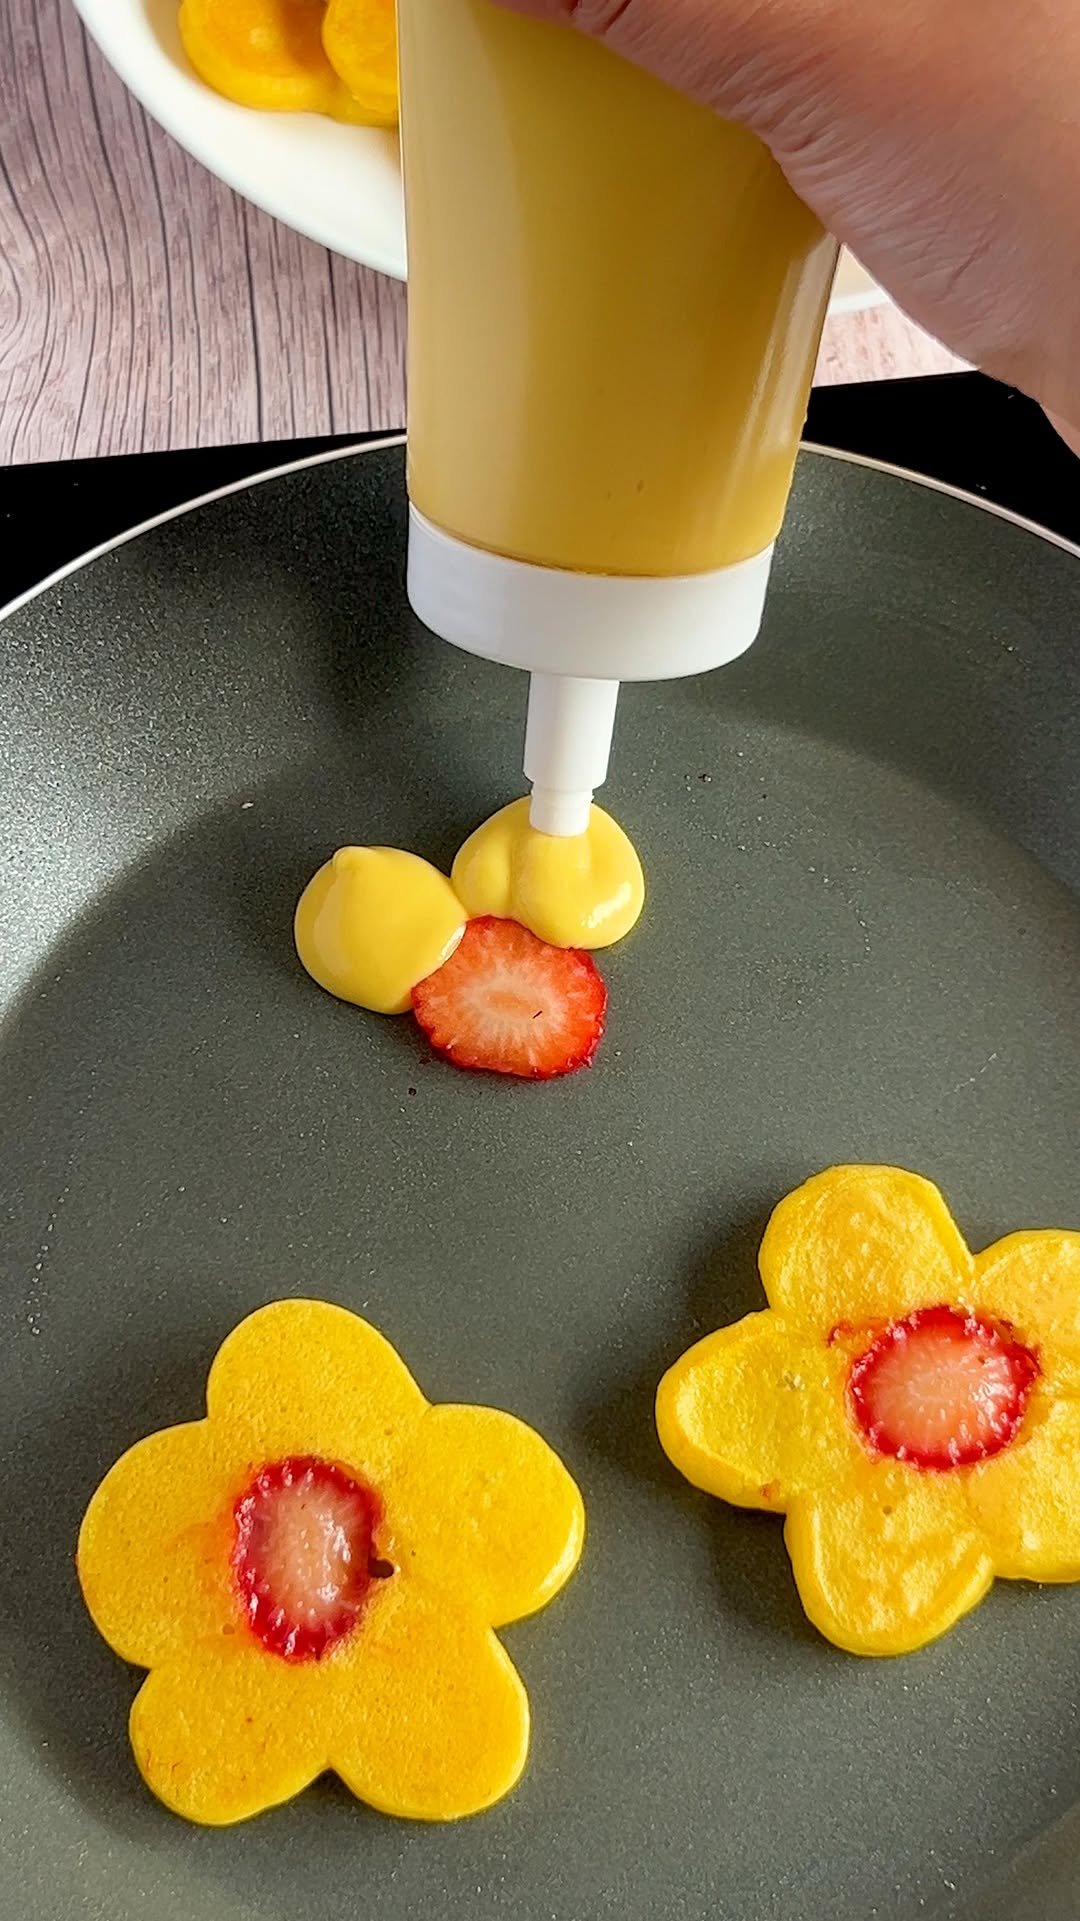
【ホットケーキミックス、そのまま焼くのちょっと待って!】いちごを置いて焼いたら、お花みたいで食べるのもったいない / Flower Shaped Pancakes @tastyjapan 👈他のレシピもチェック! 2〜3人分 材料: ホットケーキミックス 150g かぼちゃパウダー 小さじ2 牛乳 110ml サラダ油 小さじ2 いちご(スライス) 適量 作り方: ① ボウルにホットケーキミックスとかぼちゃパウダーを入れて混ぜ、牛乳を少しずつ加えてなめらかになるまで混ぜる。生地をディスペンサーに移す。 ② フライパンに薄くサラダ油を引いて中火で熱し、いちごを置く。まわりに①の生地を花の形になるように絞り出す。両面を焼いて火が通ったら、完成! お好みで粉砂糖をかけて召し上がれ! === Flower Pancakes Servings: 2 to 3 INGREDIENTS 150g pancake mix 2 teaspoons pumpkin powder 110ml milk 2 teaspoons vegetable oil Strawberries (sliced), as needed PREPARATION 1. Mix the pancake mix and the pumpkin powder into a bowl. Add the milk gradually into the bowl. Mix until smooth. Transfer the mixture into a pancake dispenser. 2. Heat a frying pan lightly coated with the vegetable oil over medium heat. Arrange the strawberry slices on the pan. With the dispenser, pour the batter (1) around the berry slices to draw flowers. Cook both sides until golden. 3. You may add some powdered sugar on top. Enjoy! #tastyjapan #ホットケーキミックス #お花のパンケーキ #pancakes
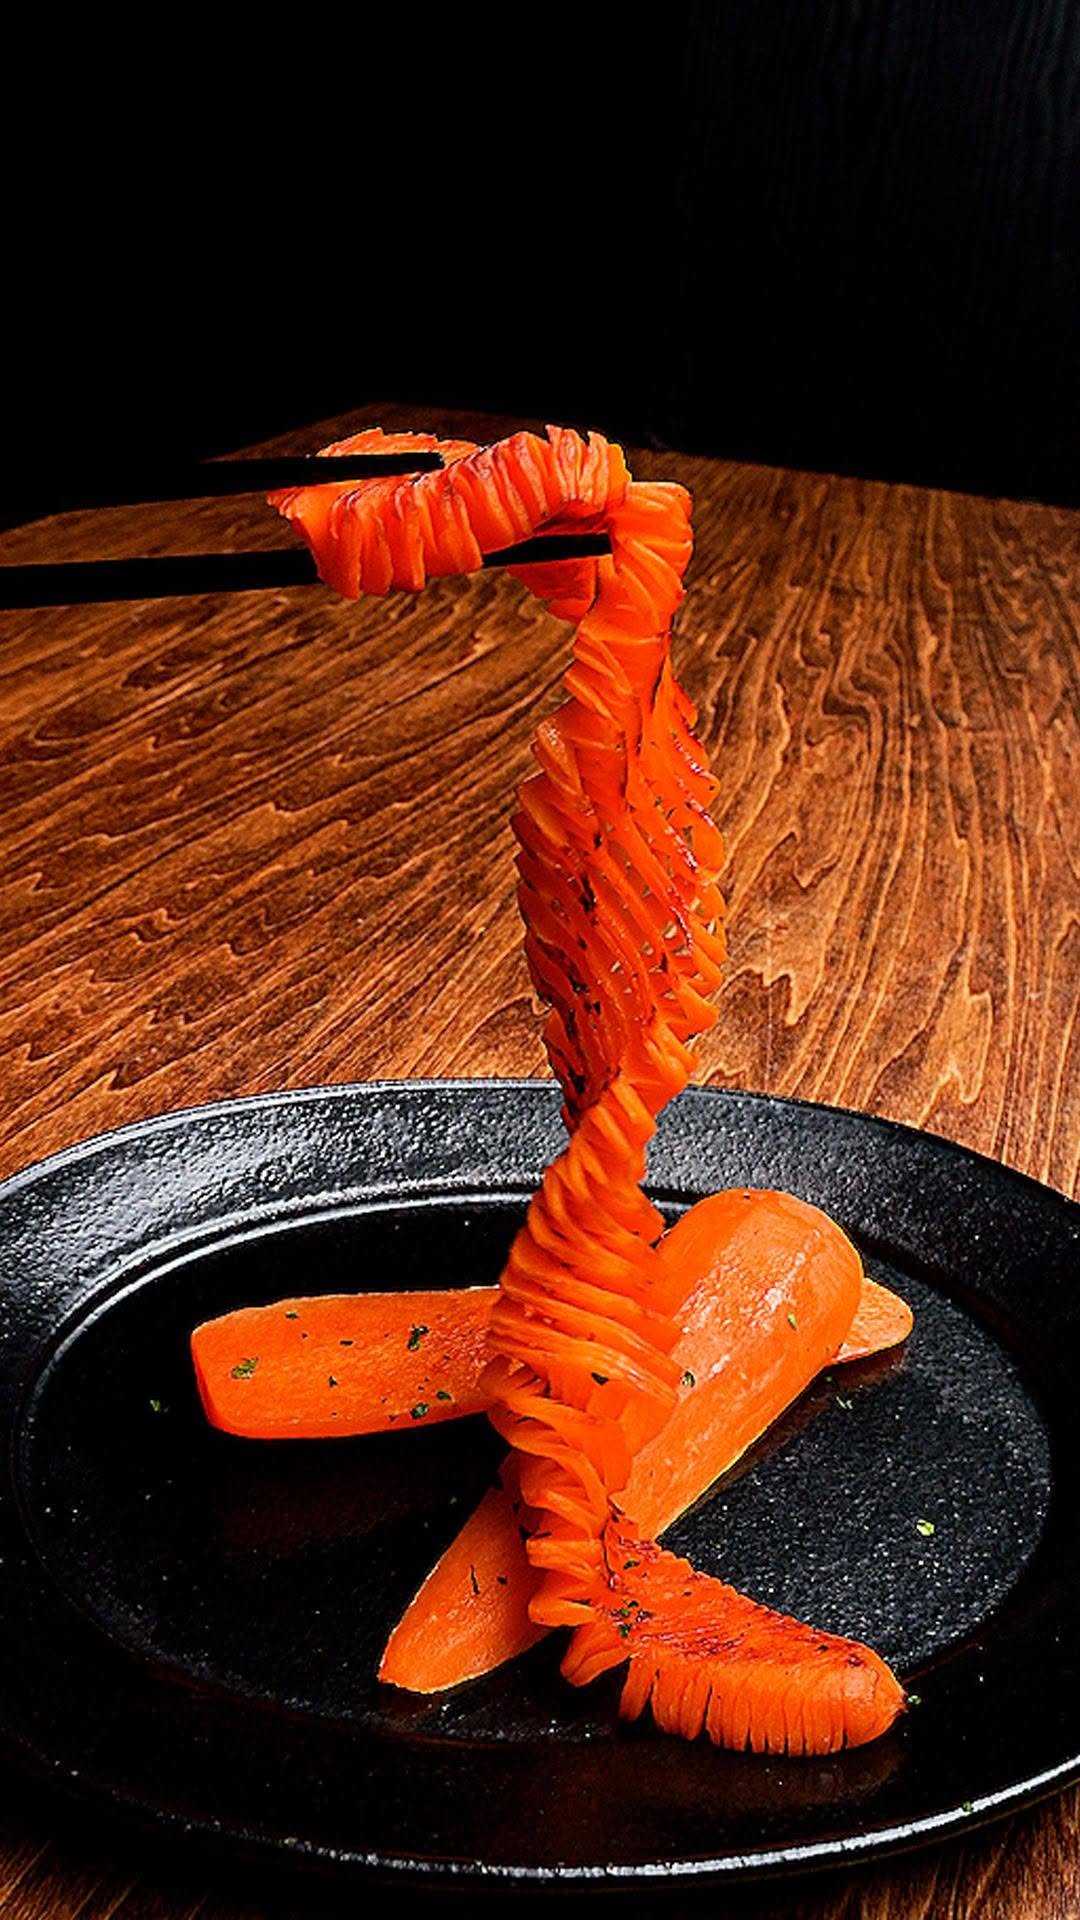
【え!にんじんが1分で消えた♡】もう冷蔵庫に余らない!簡単絶品野菜レシピ / Accordion Carrots @tastyjapan 👈他のレシピもチェック! 1人分 材料: にんじん 1本 オリーブオイル 大さじ1 塩 適量 パセリ 適量 作り方: ① にんじんの皮をむき、1センチ幅に切る。 ② ①の上下に割り箸をおき、切り込みを入れる。裏返して45度に回し、切り込みを入れて塩をふる。 ③ フライパンにオリーブオイルをひき、にんじんを入れてふたをし、弱火で4分ずつ両面焼く。お好みでパセリをかけたら、完成! === Accordion Carrots Servings: 1 INGREDIENTS 1 carrot 1 tablespoon olive oil Salt, as needed Parley, as needed PREPARATION 1. Peel the carrot. Cut into 1cm slices. 2. Place a carrot slice (1) between chopsticks (top and bottom). Cut the potato, rotate it 45 degree, and cut again as shown in the video. Season with salt. 3. Put the olive oil in a pan. Place the carrot slices (2). Cook both sides for 4 minutes on low heat with a lid on. Add some parsley on top. 4. Enjoy! #tastyjapan #にんじん #おつまみ #簡単レシピ
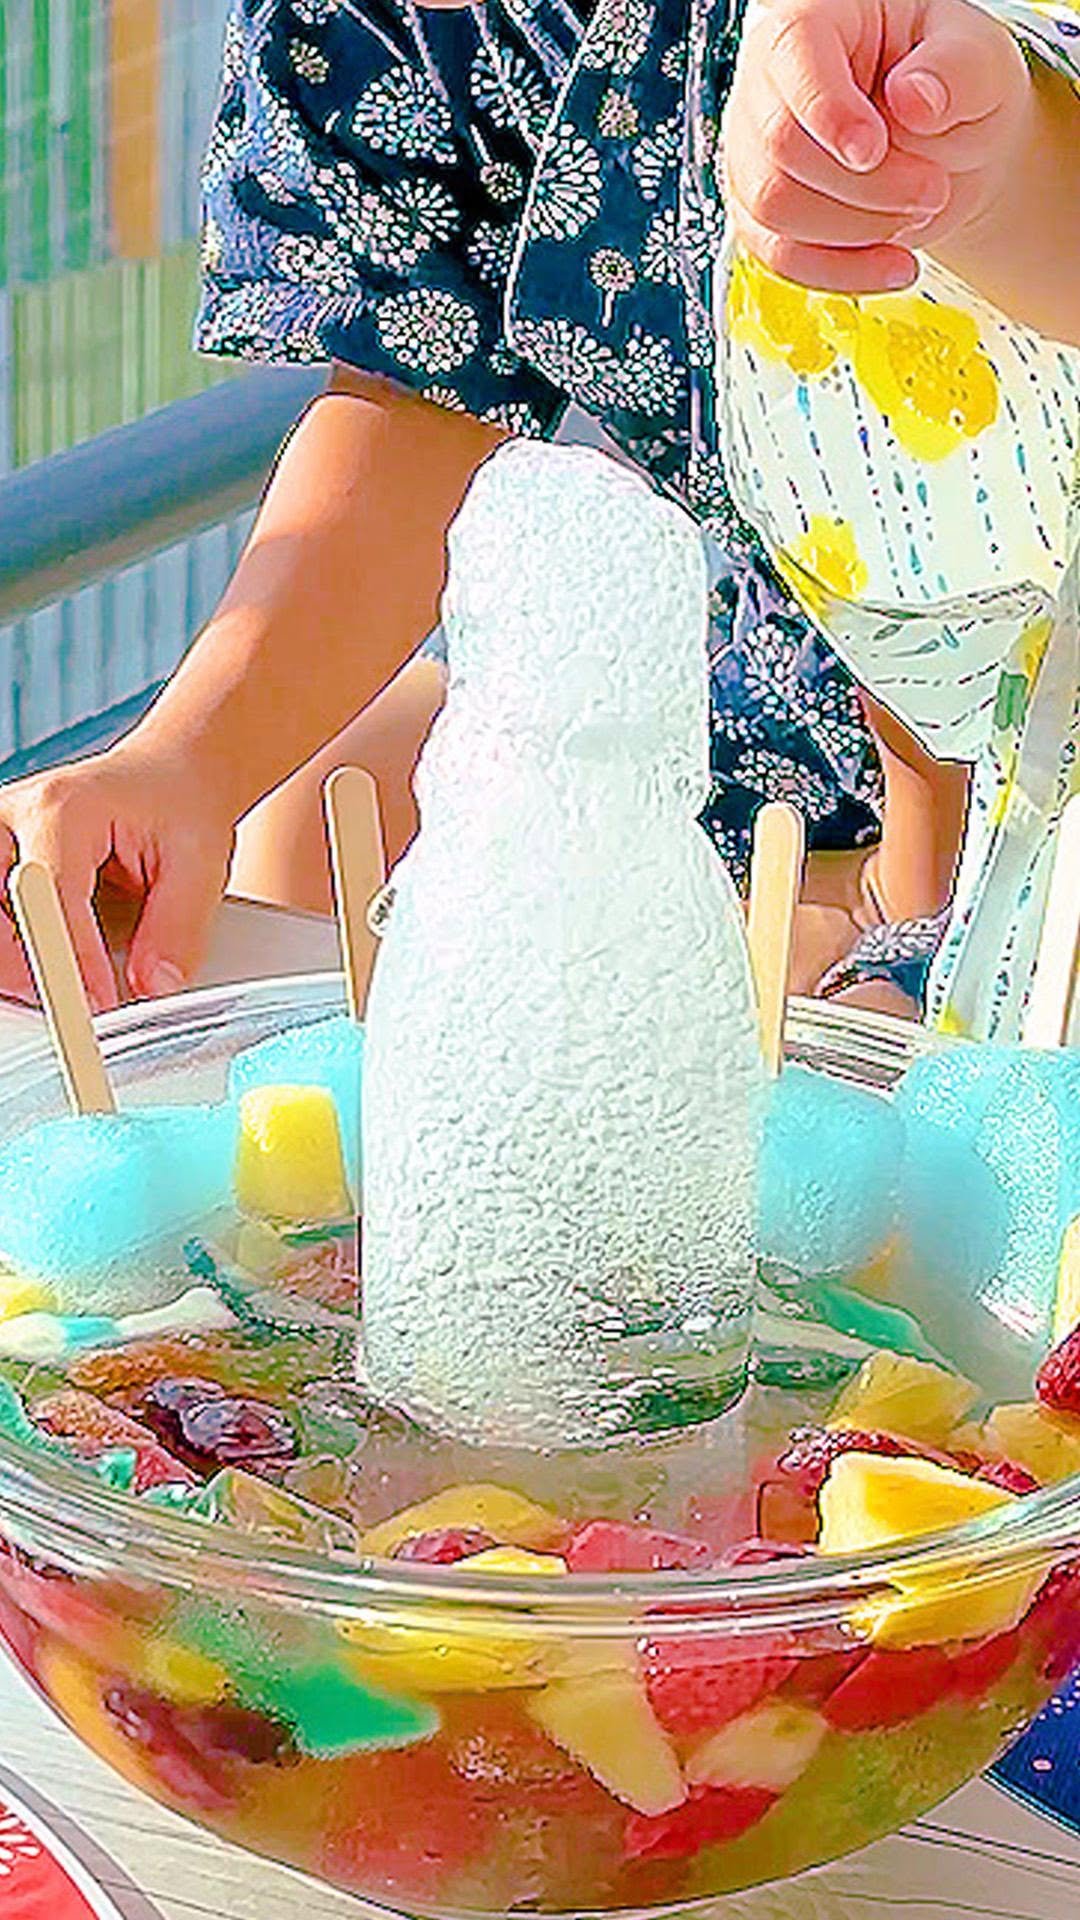
【今すぐできるよ♡噴水サイダー】「子供が飛んで喜んだ!」フルーツ盛り盛りのおやつレシピ / Party Soda @tastyjapan 👈他のレシピもチェック! 4人分 材料: 氷 適量 冷凍カットフルーツ 400g グミ 200g アイスキャンディー 4本 サイダー 500ml メロンソーダ 1L ラムネ 1粒 作り方: ① 大きいボウルに氷、冷凍カットフルーツ、グミ、アイスキャンディーを入れる。 ② ①の中心にサイダーのボトルを立て、周りにメロンソーダを注ぎ入れる。 ③ ②のサイダーにラムネを入れたら、完成! ※サイダーのペットボトルはきれいに拭いてから使用してください。 === Party Soda Servings: 4 INGREDIENTS Ice, as needed 400g frozen fruits 200g gummy 4 ice pops 500ml soda 1l melon soda 1 piece 'RAMUNE'soft candy PREPARATION 1. Put the ice, the frozen fruits, the gummy, and the ice pops in a large bowl. 2. Place the soda bottle in the center of the bowl (1). Pour the melon soda into the bowl. 3. Put the RAMUNE piece in the soda. 4. Enjoy! #tastyjapan #夏休み #サイダー #party
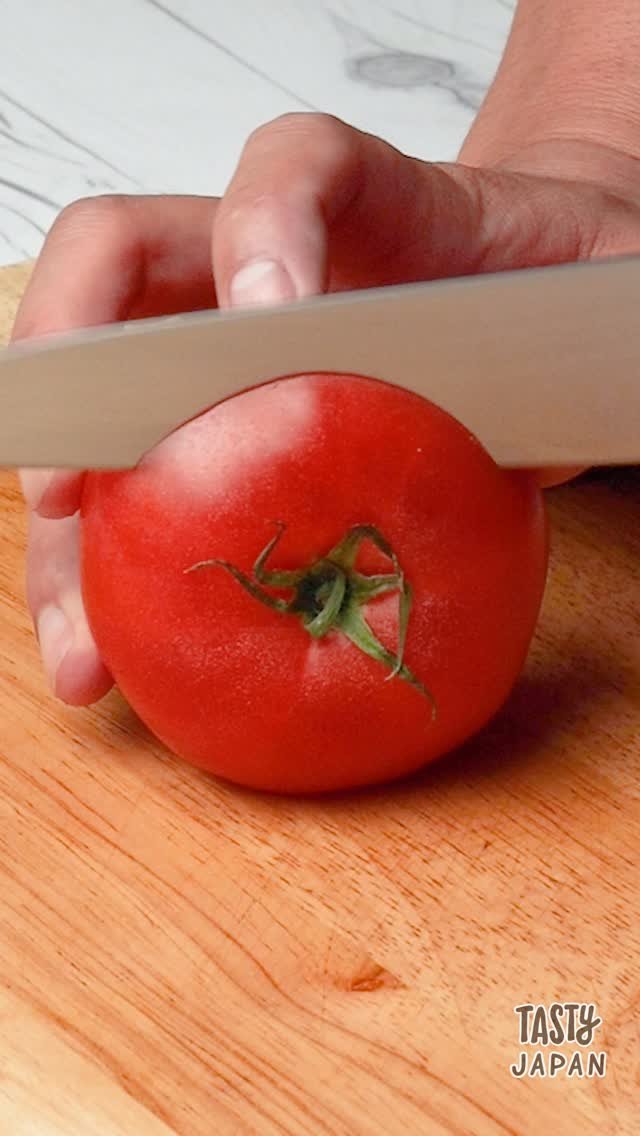
【サラダは包んで食べる時代!】野菜はいつもの倍量用意して♪こどもも喜ぶサラダロール / Slad Wraps @tastyjapan 👈他のレシピもチェック! 2人分 材料: ライスペーパー 3枚 レタス 3〜4枚 きゅうり 1本 にんじん 1/2本 紫キャベツ 1/4玉 トマト 1個 アボカド 1個 作り方: ① きゅうり、にんじん、紫キャベツはそれぞれ千切りにする。 ② トマト、アボカドはそれぞれ薄切りにする。 ③ ぬるま湯でぬらしたライスペーパーを少しずつ重なるように3枚並べる。 ④ ③の上にレタスをしき、①と②をおく。 ⑤ ライスペーパーごと巻いたら、完成! ※お好みのドレッシングをつけて召し上がれ! === Slad Wraps Servings: 2 INGREDIENTS 3 rice paper wrappers 3 to 4 lettuce leaves 1 cucumber 1/2 carrot 1/4 red cabbage 1 tomato 1 avocado PREPARATION 1. Shred the cucumber, the carrot, and the cabbage. 2. Slice the tomato and the avocado. 3. Dip rice paper wrappers in the warm water and place them on a board. (Make sure to overwrap each other.) 4. Place lettuce leaves on (3). Put (1) and (2). 5. Roll the wrapper with all the veggies. 6. Enjoy with your favorite dressing! #tastyjapan #サラダ #salad #ライスペーパー

豚バラ肉をトルネードさせたらワイルドでおしゃれな料理になった。 / Pork Belly Twist @tastyjapan 👈他のレシピもチェック! 2人分 材料: 豚バラ肉ブロック 600g A塩 適量 Aコショウ 適量 Aケイジャンスパイス 大さじ1 BBQソース 適量 作り方: ① 豚バラ肉を棒状に切り、串にさす。 ② ①を冷凍庫に1時間入れ、半解凍状態のままトルネード状に切り込みを入れる。 ③ ②の肉にAをまぶし下味をつける。 ④ 天板にクッキングシートをしき③をのせ、220度のオーブンで20分焼く。一度取り出しBBQソースを塗り、再度5分ほど焼いたら、完成! === Pork Belly Twist Servings: 2 INGREDIENTS 600g pork belly A some salt some pepper 1 tablespoon cajun spice mix Some BBQ sauce PREPARATION 1. Cut the pork into bars. Insert a skewer. 2. Chill the pork (1) in the freezer for 1 hour until half way frozen. Hold a knife at an angle and turn the pork around the knife to make spiral cut. 3. Rub all A ingredients onto the pork (2). 4. Place the pork (3) onto a baking pan lined with a parchment paper. Bake for 20 minutes in the oven (220°C/428°F). Remove the pork from the oven and put some BBQ sauce. Bake for 5 more minutes. 5. Enjoy! #tastyjapan #豚肉 #肉料理 #肉レシピ
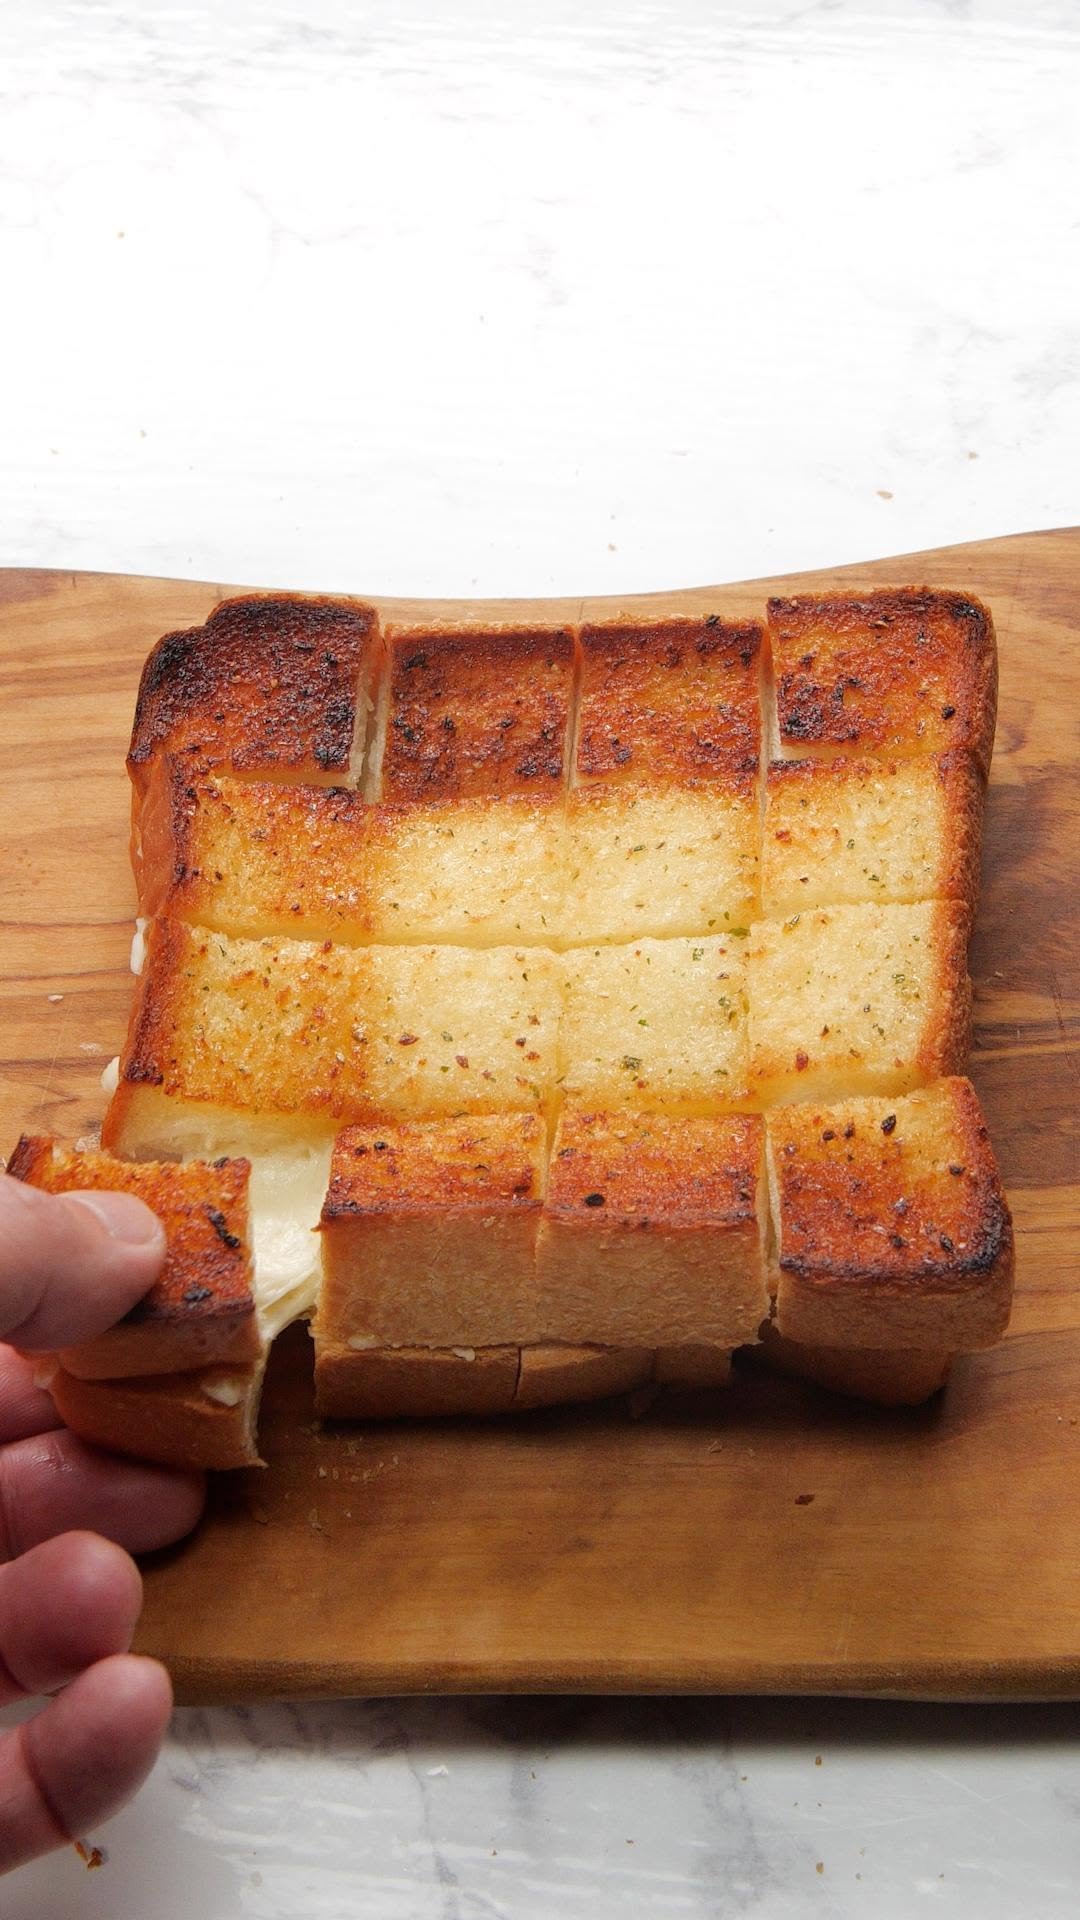
【サクサクとろーり】グリルチーズトースト / Garlic Cheese Toast @tastyjapan 👈他のレシピもチェック! 1人分 材料: 食パン 2枚 Aバター(常温に戻す) 20g Aハチミツ 大さじ1 Aにんにくすりおろし 小さじ1 Aハーブソルト 小さじ1/2 スライスチーズ 4枚 作り方: ① ボウルにAを入れよく混ぜ合わせる。 ② 食パンに切り込みを入れ、その上にスライスチーズをのせる。さらに食パンをのせ①を塗り同じように切り込みを入れる。 ③ ②をオーブントースターでこんがり焼いたら、完成! === Garlic Cheese Toast Servings: 1 INGREDIENTS 2 bread slices A 20g butter (at room temperature) 1 tablespoon honey 1 teaspoon grated garlic 1/2 teaspoon herb salt 4 cheese slices PREPARATION 1. Mix all of the ingredients A in a bowl. 2. Cut slits in the bread and place cheese slices on top. Place another slice of bread. Spread (1) and cut slits in it. 3. Bake (2) in the toaster oven until golden. 4. Enjoy! #tastyjapan #ガーリックトースト #garlictoast

【プロの1杯】おいしくて美しい〜 ラテアートの世界☕️ / Satisfying Latte Art @tastyjapan 👈他のレシピもチェック! 取材協力 @deandeluca_jp #tastyjapan #deananddeluca #ラテアート #コーヒー #バリスタ
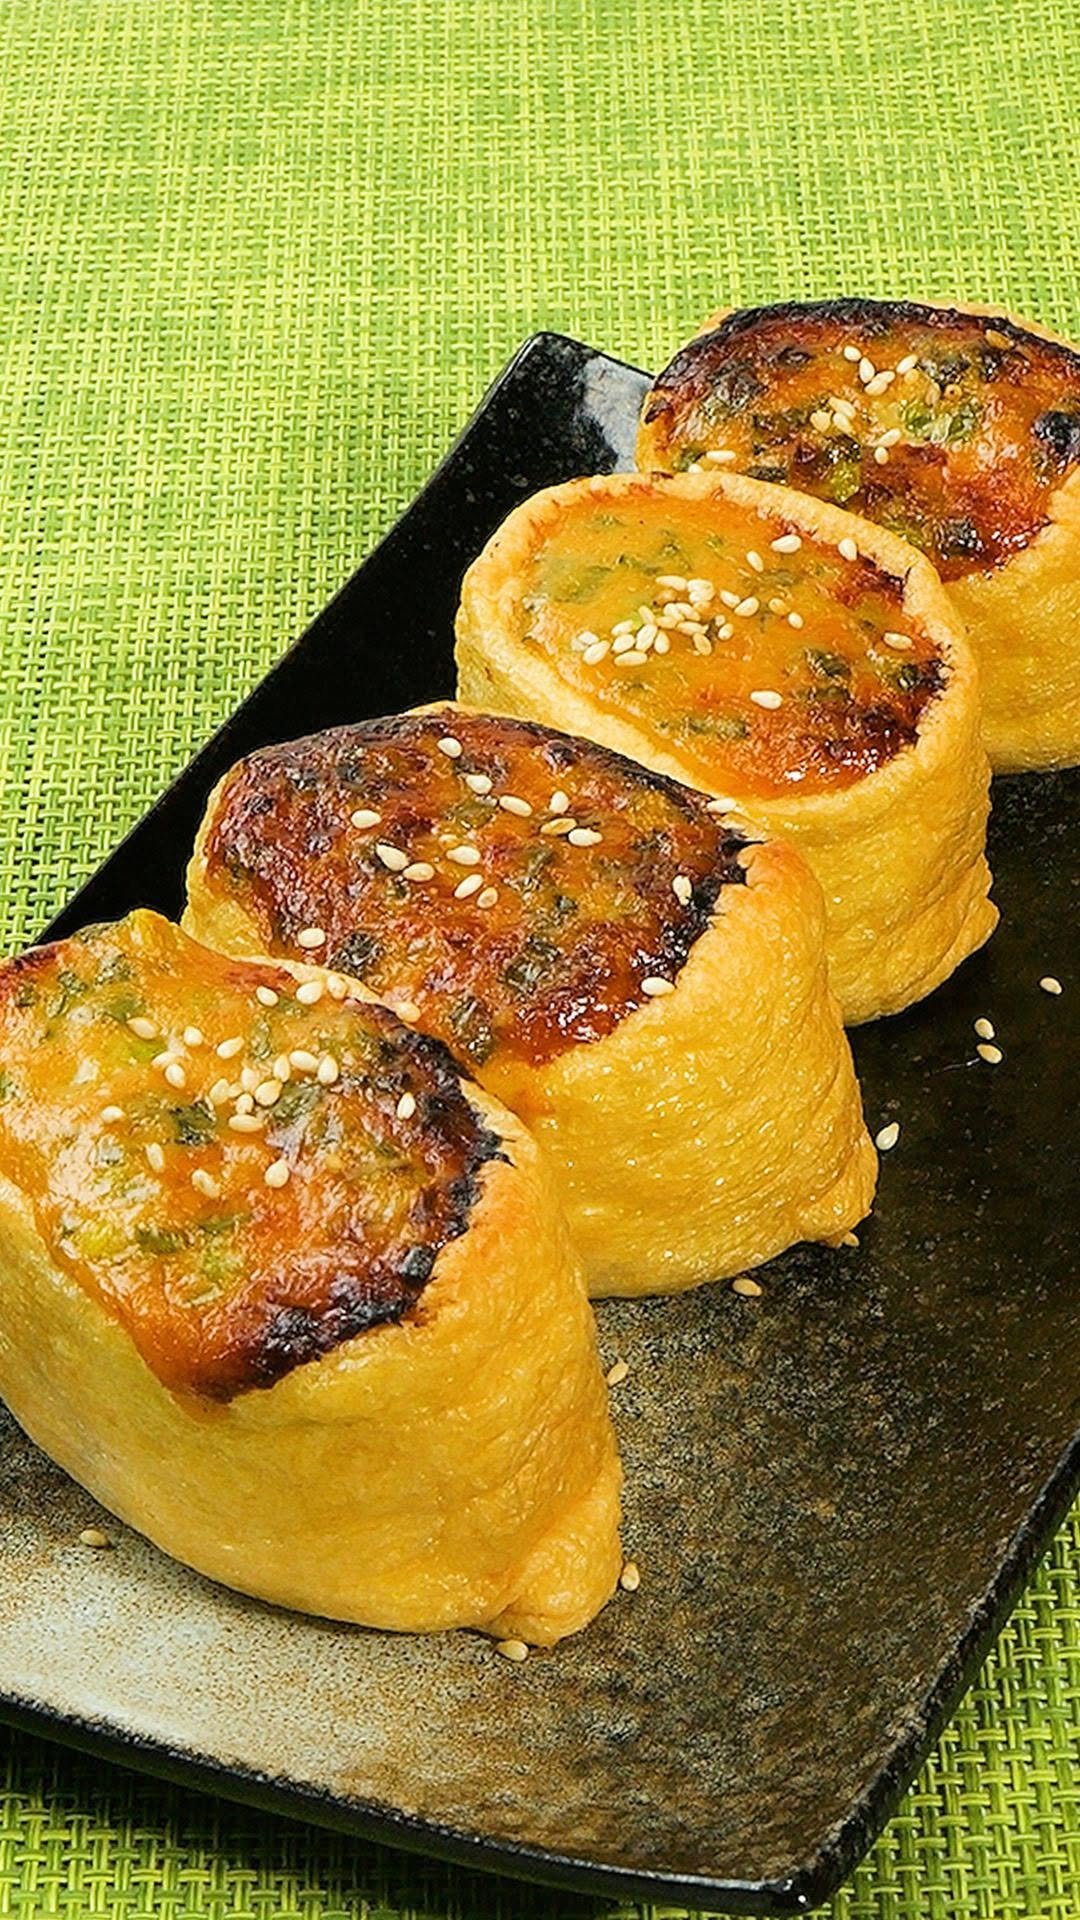
【油揚げ買ったら絶対作って♡】爆ウマなのにコスパ最強!簡単トースターレシピ / Roast Inari-Sushi with Miso Sauce @tastyjapan 👈他のレシピもチェック! 2人分 材料: 油揚げ 2枚 ご飯 200g 【A】マヨネーズ 大さじ2 【A】みそ 大さじ1 【A】小ねぎ(小口切り) 4本 白ごま 適量 作り方: ① 油揚げは半分に切って開き、ご飯を詰める。7分目まで詰めたら、油揚げの端を内側に折り込む。 ② ①に混ぜ合わせた【A】をのせる。 ③ 天板にアルミホイルを敷き、②を並べる。トースターでこんがりと焼き色がつくまで焼く。お皿に盛り、白ごまをのせたら、完成! === Roast Inari-Sushi with Miso Sauce Servings: 2 INGREDIENTS 2 aburaage (deep fried tofu) 200g steamed rice A 2 tablespoons mayonnaise 1 tablespoon miso 4 strings scallion (chopped) Whie sesame seeds, as needed PREPARATION 1. Cut the aburaage into halves. Put the rice in each aburaage half. Fold in the edge of the aburaage. 2. Mix all of the ingredients A in a bowl. Put on (1). 3. Place (2) on a baking tray lined with a foil. Cook in the toaster oven until golden. Add some white sesame seeds on top. 4. Enjoy! #tastyjapan #油揚げ #おつまみレシピ #節約