인기 검색 계정


Protein & Cottage Kitchen(@protein_cottage_kitchen) 인스타그램 상세 프로필 분석: 팔로워 94,481, 참여율 0.21%

@protein_cottage_kitchen
Protein & Cottage Kitchen
Wholesome, high-protein recipes made simple 💪✨ From cottage cheese creations to protein-packed bites — healthy, delicious, and guilt-free! 🍓🍳
@protein_cottage_kitchen님과 연관된 프로필
연관 프로필이 없습니다
이 계정에 대한 연관 프로필 정보를 찾을 수 없습니다
@protein_cottage_kitchen 계정 통계 차트
게시물 타입 분포
시간대별 활동 분석 (최근 게시물 기준)
@protein_cottage_kitchen 최근 게시물 상세 분석
이미지 게시물 분석
동영상 게시물 분석
@protein_cottage_kitchen 최근 게시물

Big news for healthy recipe lovers 💥 I’ve launched a new page with brand-new videos and recipes, all made for protein lovers, cottage cheese fans, and anyone who enjoys easy, quick recipes 💪 If you’re looking for fresh ideas for breakfast, snacks, and healthy desserts, this page will be perfect for you 🍓🍳 Everyone is welcome, and thank you for supporting the new page so we can reach more people ❤️
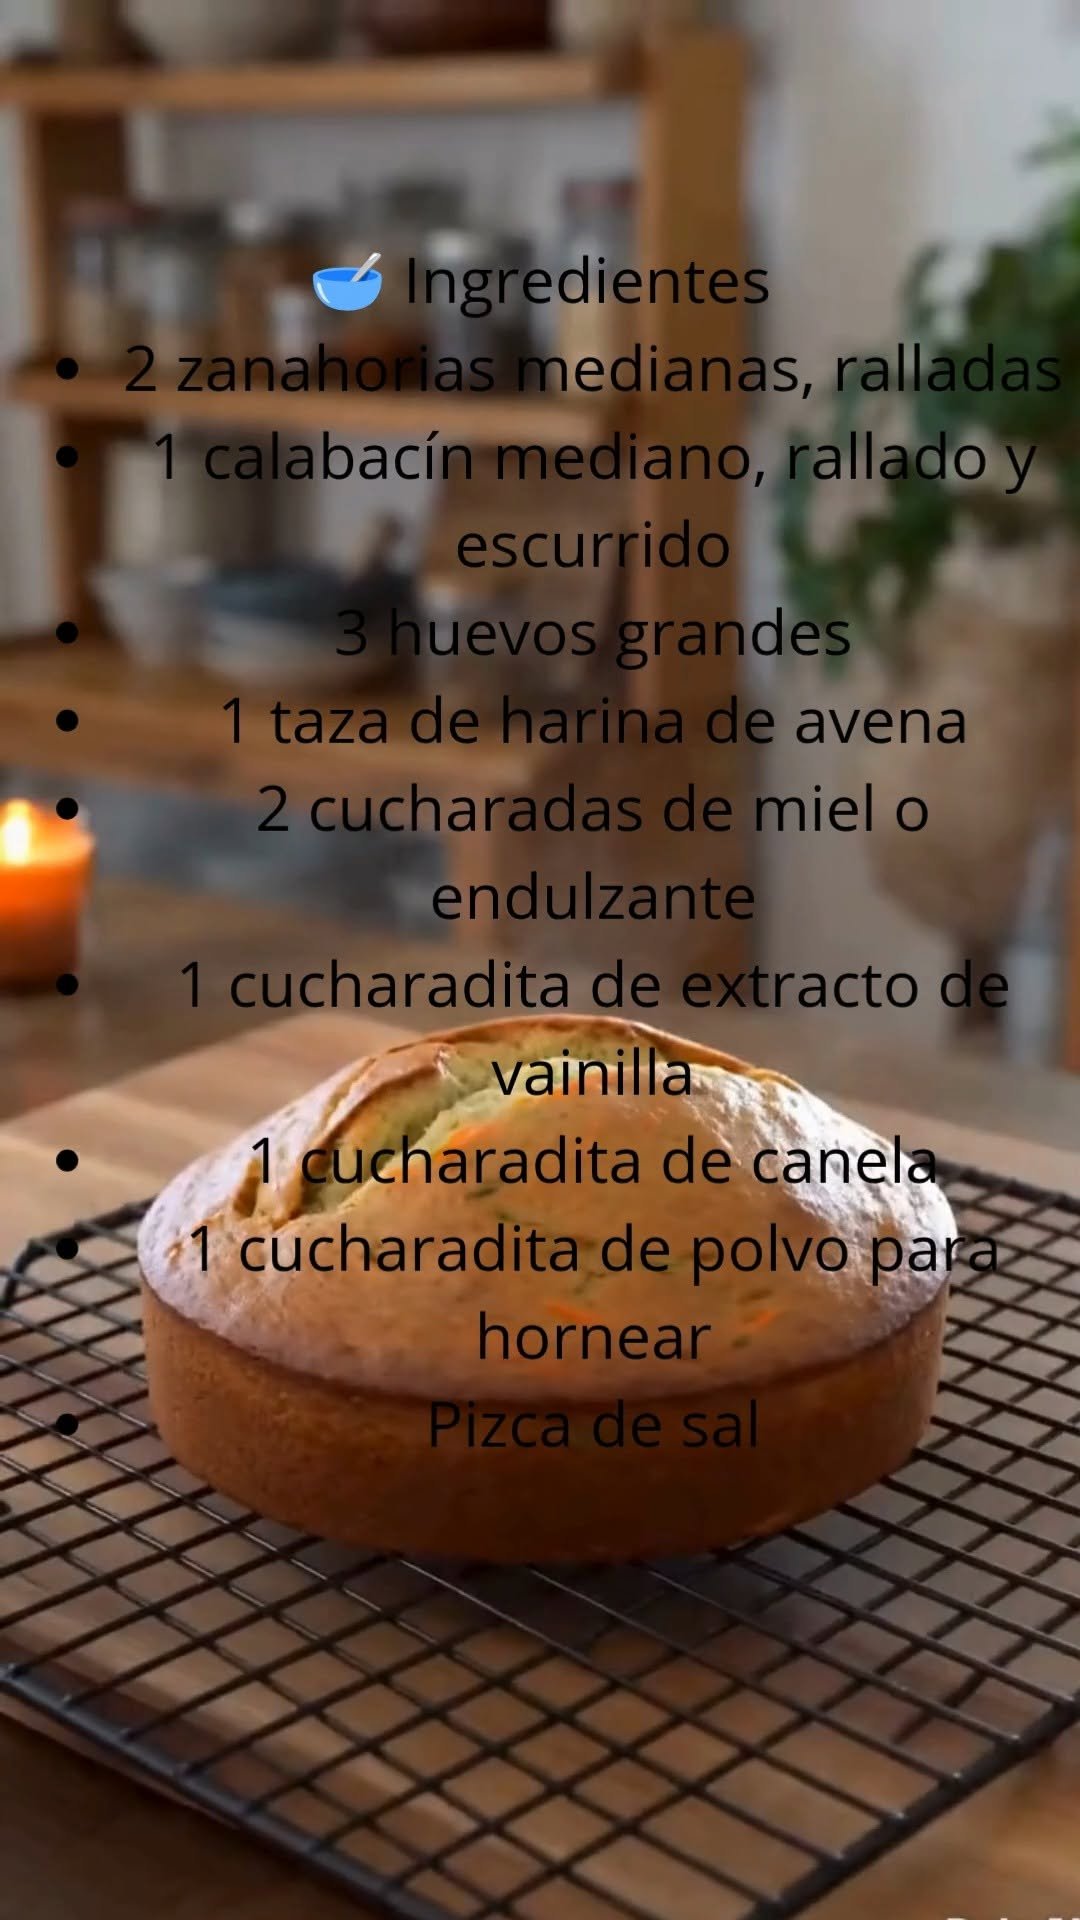
🥕🎂 Pastel de Zanahoria y Calabacín – Suave, Húmedo y Deliciosamente Casero Este pastel combina la dulzura natural de la zanahoria con la suavidad del calabacín para crear un postre tierno, ligero y lleno de sabor. Perfecto para el desayuno, la merienda o cualquier momento del día. 🥣 Ingredientes * 2 zanahorias medianas, ralladas * 1 calabacín mediano, rallado y escurrido * 3 huevos grandes * 1 taza de harina de avena * 2 cucharadas de miel o endulzante * 1 cucharadita de extracto de vainilla * 1 cucharadita de canela * 1 cucharadita de polvo para hornear * Pizca de sal 👩🍳 Instrucciones 1️⃣ Precalienta el horno a 180°C (350°F) y engrasa ligeramente un molde. 2️⃣ En un recipiente, mezcla los huevos, la miel y la vainilla. 3️⃣ Agrega la zanahoria rallada y el calabacín escurrido. 4️⃣ Incorpora la harina de avena, la canela, el polvo para hornear y la sal. 5️⃣ Mezcla hasta obtener una masa homogénea. 6️⃣ Vierte la preparación en el molde y hornea durante 30–35 minutos. 7️⃣ Deja enfriar antes de cortar y servir. ✨ Un pastel húmedo, aromático y lleno de ingredientes sencillos que encantará a toda la familia. #PastelDeZanahoria #PastelDeCalabacin #RecetasSaludables #PostresCaseros #ReposteriaFacil #DesayunoSaludable #RecetasFaciles #ComidaCasera
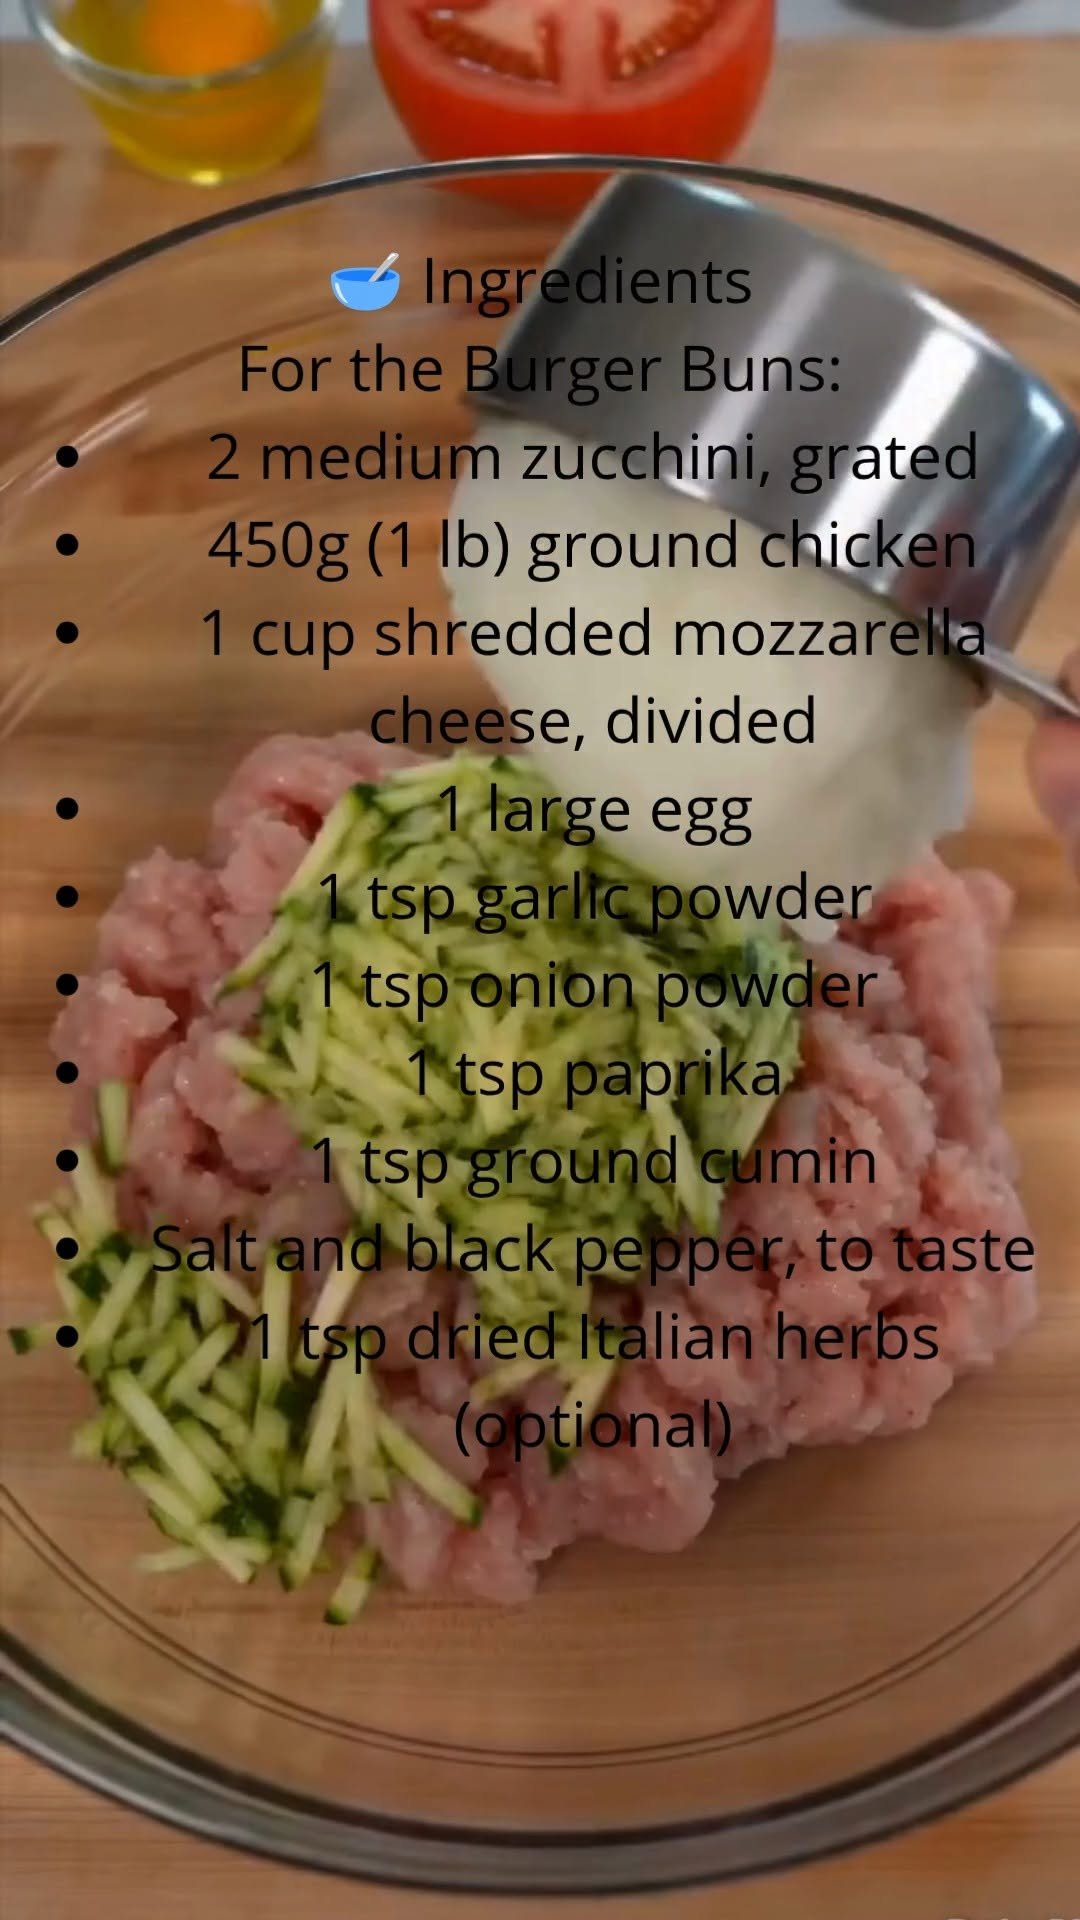
🍔🧀 Cheesy Zucchini Chicken Bun Burgers – Low-Carb, Protein-Packed & Family-Friendly Skip the traditional buns and enjoy these delicious chicken and zucchini burger sandwiches! Crispy on the outside, juicy on the inside, and loaded with cheesy flavor, they're perfect for a satisfying low-carb meal. 🥣 Ingredients For the Burger Buns: * 2 medium zucchini, grated * 450g (1 lb) ground chicken * 1 cup shredded mozzarella cheese, divided * 1 large egg * 1 tsp garlic powder * 1 tsp onion powder * 1 tsp paprika * 1 tsp ground cumin * Salt and black pepper, to taste * 1 tsp dried Italian herbs (optional) For Serving: * Lettuce leaves * Tomato slices * Greek yogurt sauce, cream cheese, or mayonnaise * Fresh basil leaves 👩🍳 Instructions 1️⃣ Preheat oven to 200°C (400°F) and line a baking tray with parchment paper. 2️⃣ Place the grated zucchini in a clean towel and squeeze out as much liquid as possible. 3️⃣ In a large bowl, combine zucchini, ground chicken, ½ cup mozzarella, egg, garlic powder, onion powder, paprika, cumin, salt, pepper, and herbs. 4️⃣ Mix until well combined. 5️⃣ Divide the mixture into 8 equal portions and shape into flat rounds on the prepared baking tray. 6️⃣ Sprinkle the remaining mozzarella cheese over the tops. 7️⃣ Bake for 20–25 minutes, or until fully cooked and golden. 8️⃣ Let cool for a few minutes. 9️⃣ Assemble by spreading your favorite sauce on one patty, then adding lettuce and tomato. Top with another patty to create a burger-style sandwich. ✨ A cheesy, satisfying burger alternative packed with protein and vegetables in every bite. #ChickenBurger #LowCarbRecipes #HealthyDinner #HighProteinMeals #ZucchiniRecipes #CottageStyleCooking #EasyMeals #HealthyEating #GlutenFreeRecipes #FamilyDinner
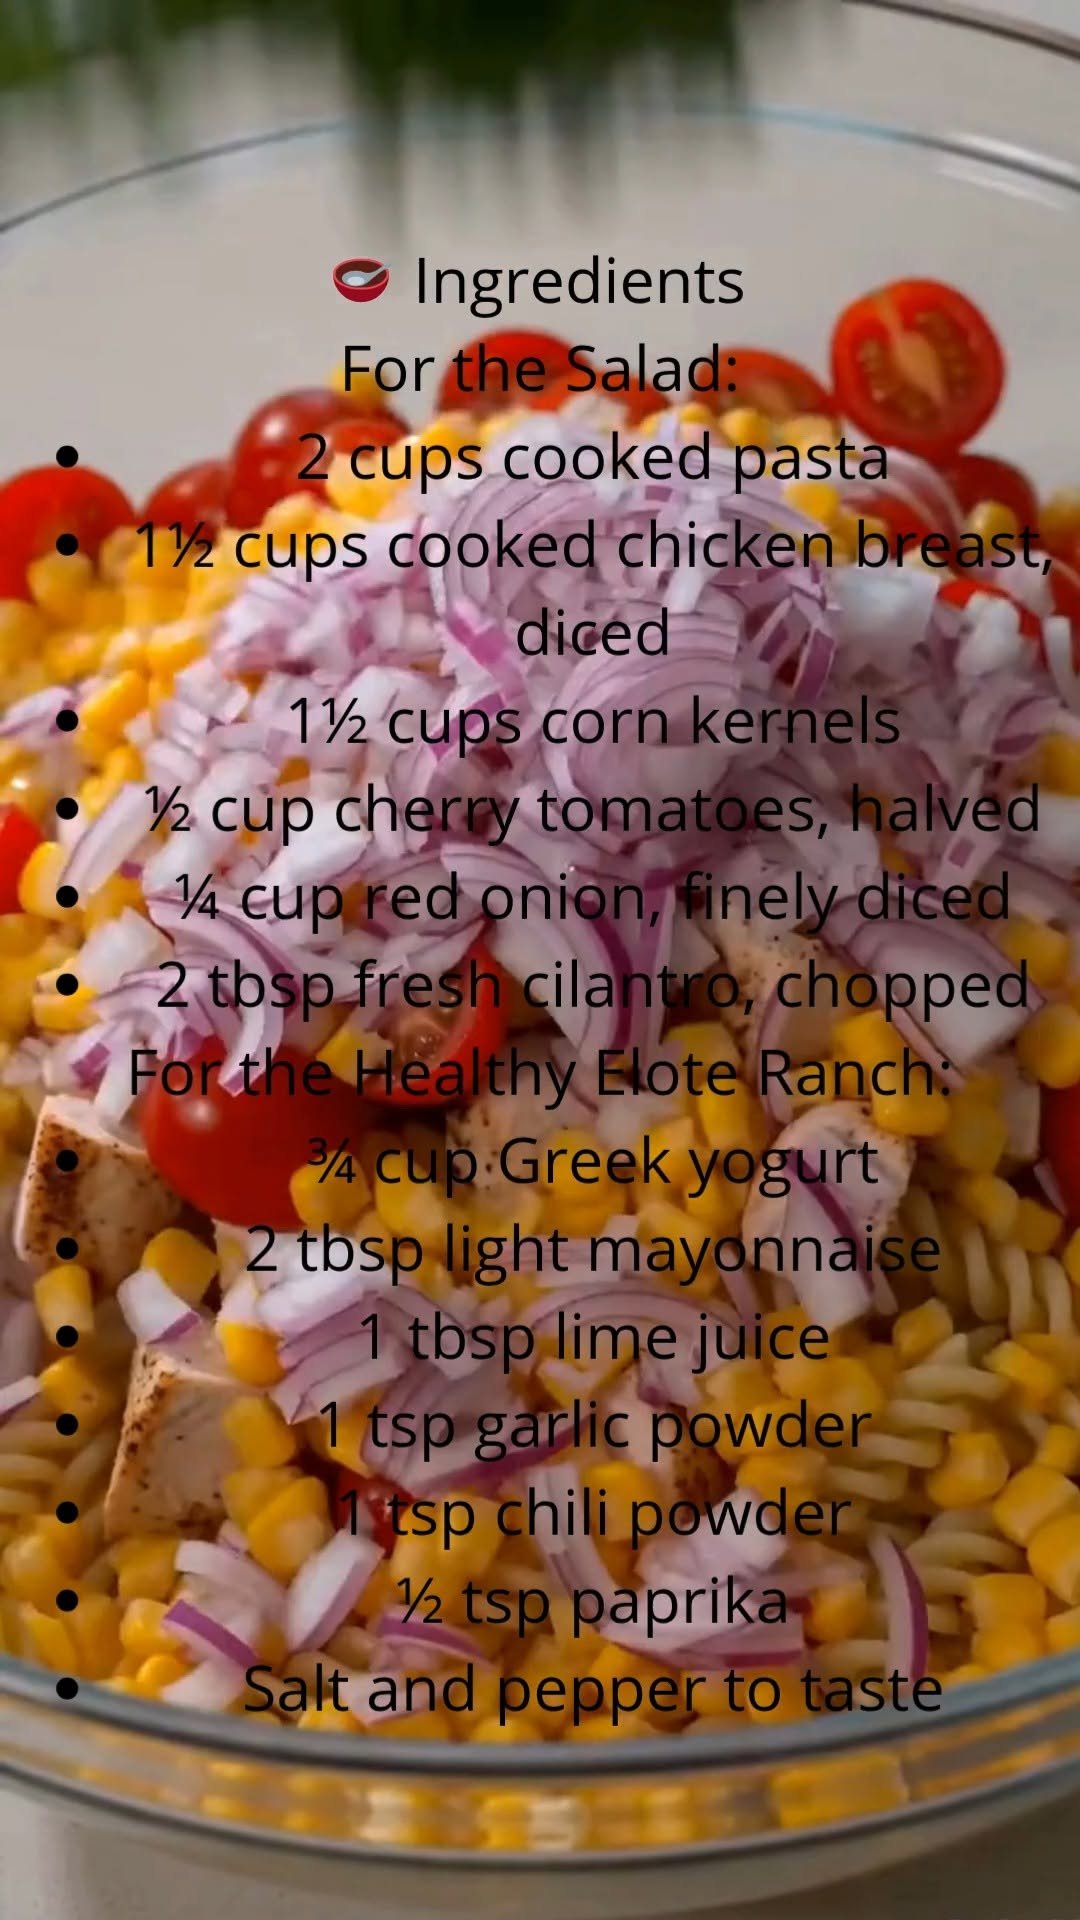
🌽🍗 Street Corn Chicken Pasta Salad with Healthy Elote Ranch – Creamy, Fresh & Protein-Packed This flavorful pasta salad combines tender chicken, sweet corn, and a creamy homemade elote-inspired ranch dressing. Perfect for meal prep, summer gatherings, or a satisfying lunch packed with protein and bold flavors. 🥣 Ingredients For the Salad: 2 cups cooked pasta 1½ cups cooked chicken breast, diced 1½ cups corn kernels ½ cup cherry tomatoes, halved ¼ cup red onion, finely diced 2 tbsp fresh cilantro, chopped For the Healthy Elote Ranch: ¾ cup Greek yogurt 2 tbsp light mayonnaise 1 tbsp lime juice 1 tsp garlic powder 1 tsp chili powder ½ tsp paprika Salt and pepper to taste 👩🍳 Instructions 1️⃣ Cook the pasta according to package directions. Drain and cool. 2️⃣ In a large bowl, combine pasta, chicken, corn, tomatoes, red onion, and cilantro. 3️⃣ In a separate bowl, whisk together all dressing ingredients until smooth. 4️⃣ Pour the dressing over the salad and toss until evenly coated. 5️⃣ Chill for 20–30 minutes before serving for the best flavor. ✨ Creamy, smoky, tangy, and loaded with wholesome ingredients in every bite. #ChickenPastaSalad #StreetCornSalad #HealthyLunch #MealPrepIdeas #HighProteinRecipes #SummerRecipes #EasyMeals #HealthyEating
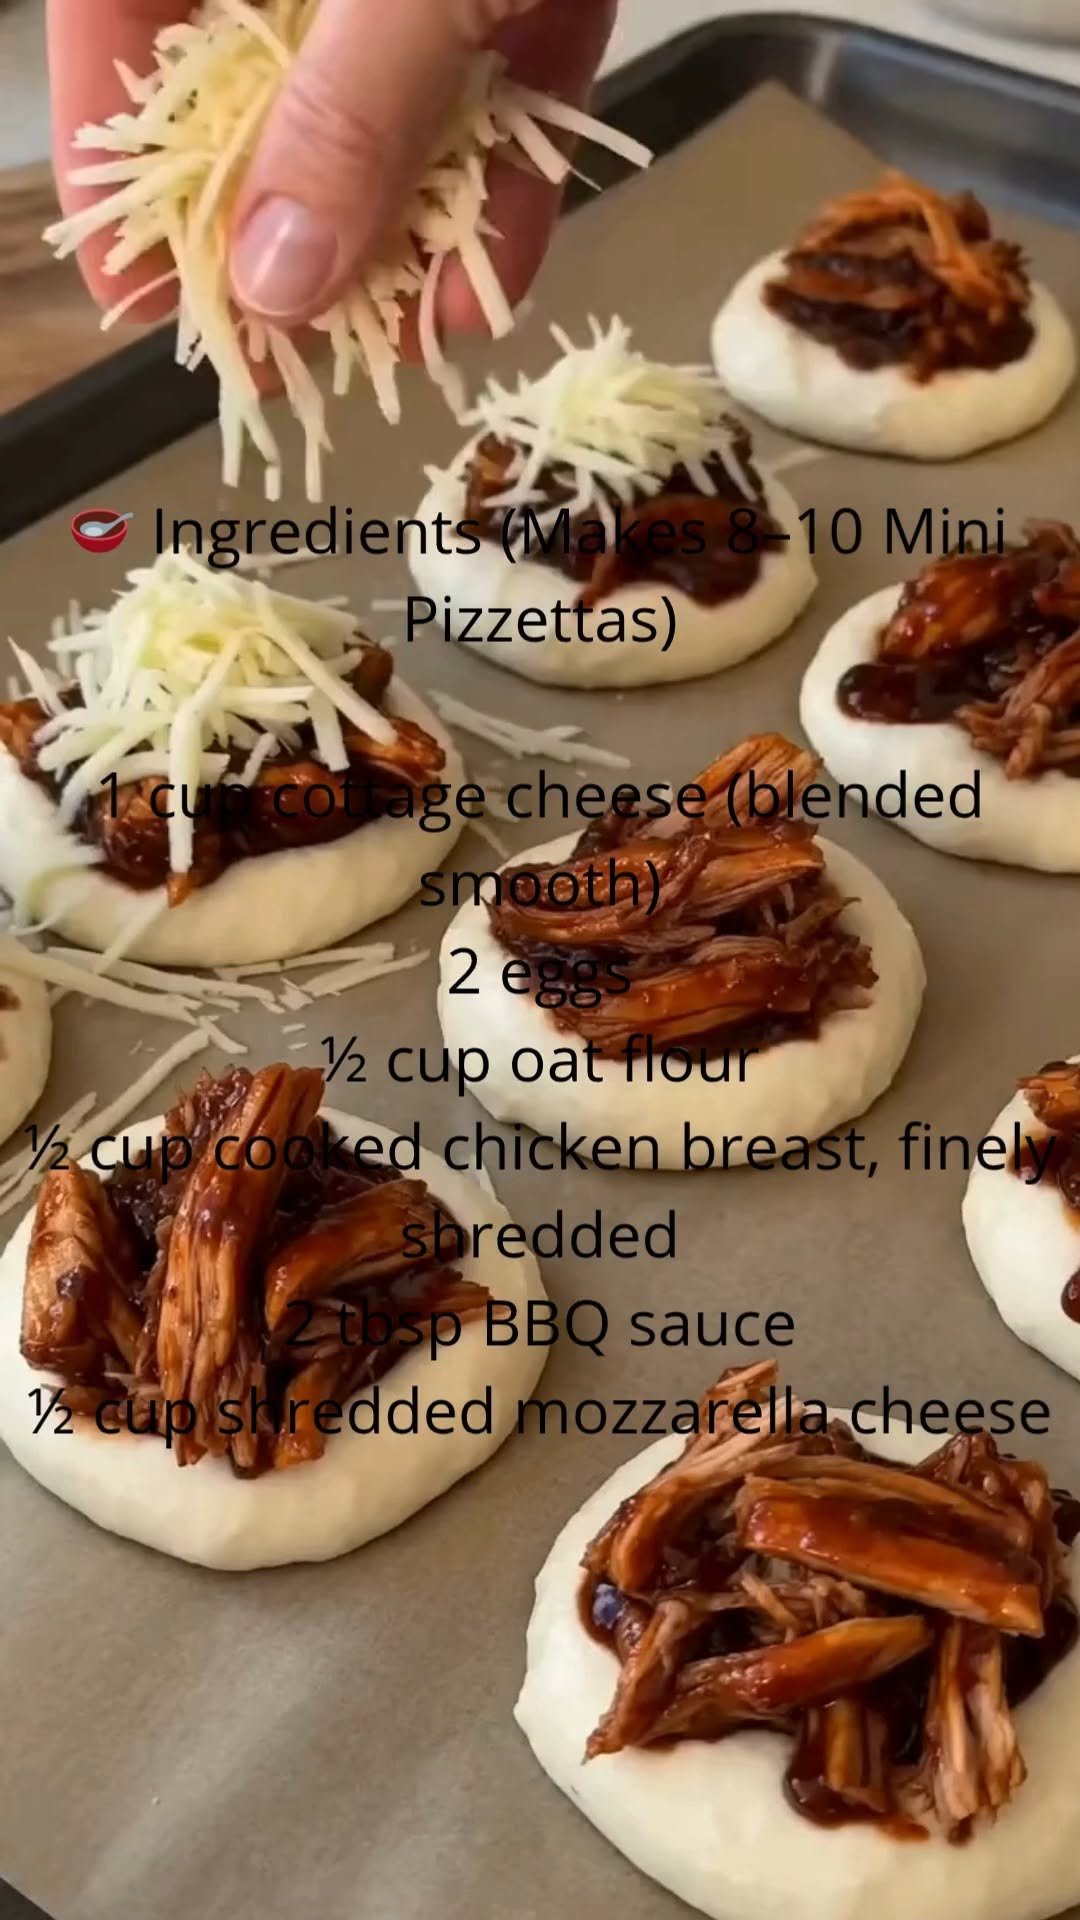
🍗🔥🧀 Mini BBQ Chicken Cottage Cheese Pizzettas – Smoky, Savory & Protein-Packed These mini pizzettas combine tender chicken, smoky BBQ flavor, and cheesy goodness in every bite. 🥣 Ingredients (Makes 8–10 Mini Pizzettas) 1 cup cottage cheese (blended smooth) 2 eggs ½ cup oat flour ½ cup cooked chicken breast, finely shredded 2 tbsp BBQ sauce ½ cup shredded mozzarella cheese 👩🍳 Instructions 1️⃣ Preheat oven to 190°C (375°F). 2️⃣ Blend cottage cheese and eggs until creamy. 3️⃣ Mix in oat flour and half of the mozzarella. 4️⃣ Spoon into small pizza rounds on a lined baking tray. 5️⃣ Combine chicken with BBQ sauce and place on top. 6️⃣ Sprinkle with remaining mozzarella. 7️⃣ Bake for 15–18 minutes until golden and cooked through. ✨ A fun, protein-rich snack that's perfect for meal prep or sharing. #BBQChickenPizza #MiniPizzettas #ProteinPacked #HealthyRecipes #CottageCheeseRecipes #EasyDinner #HomemadePizza #MealPrepIdeas
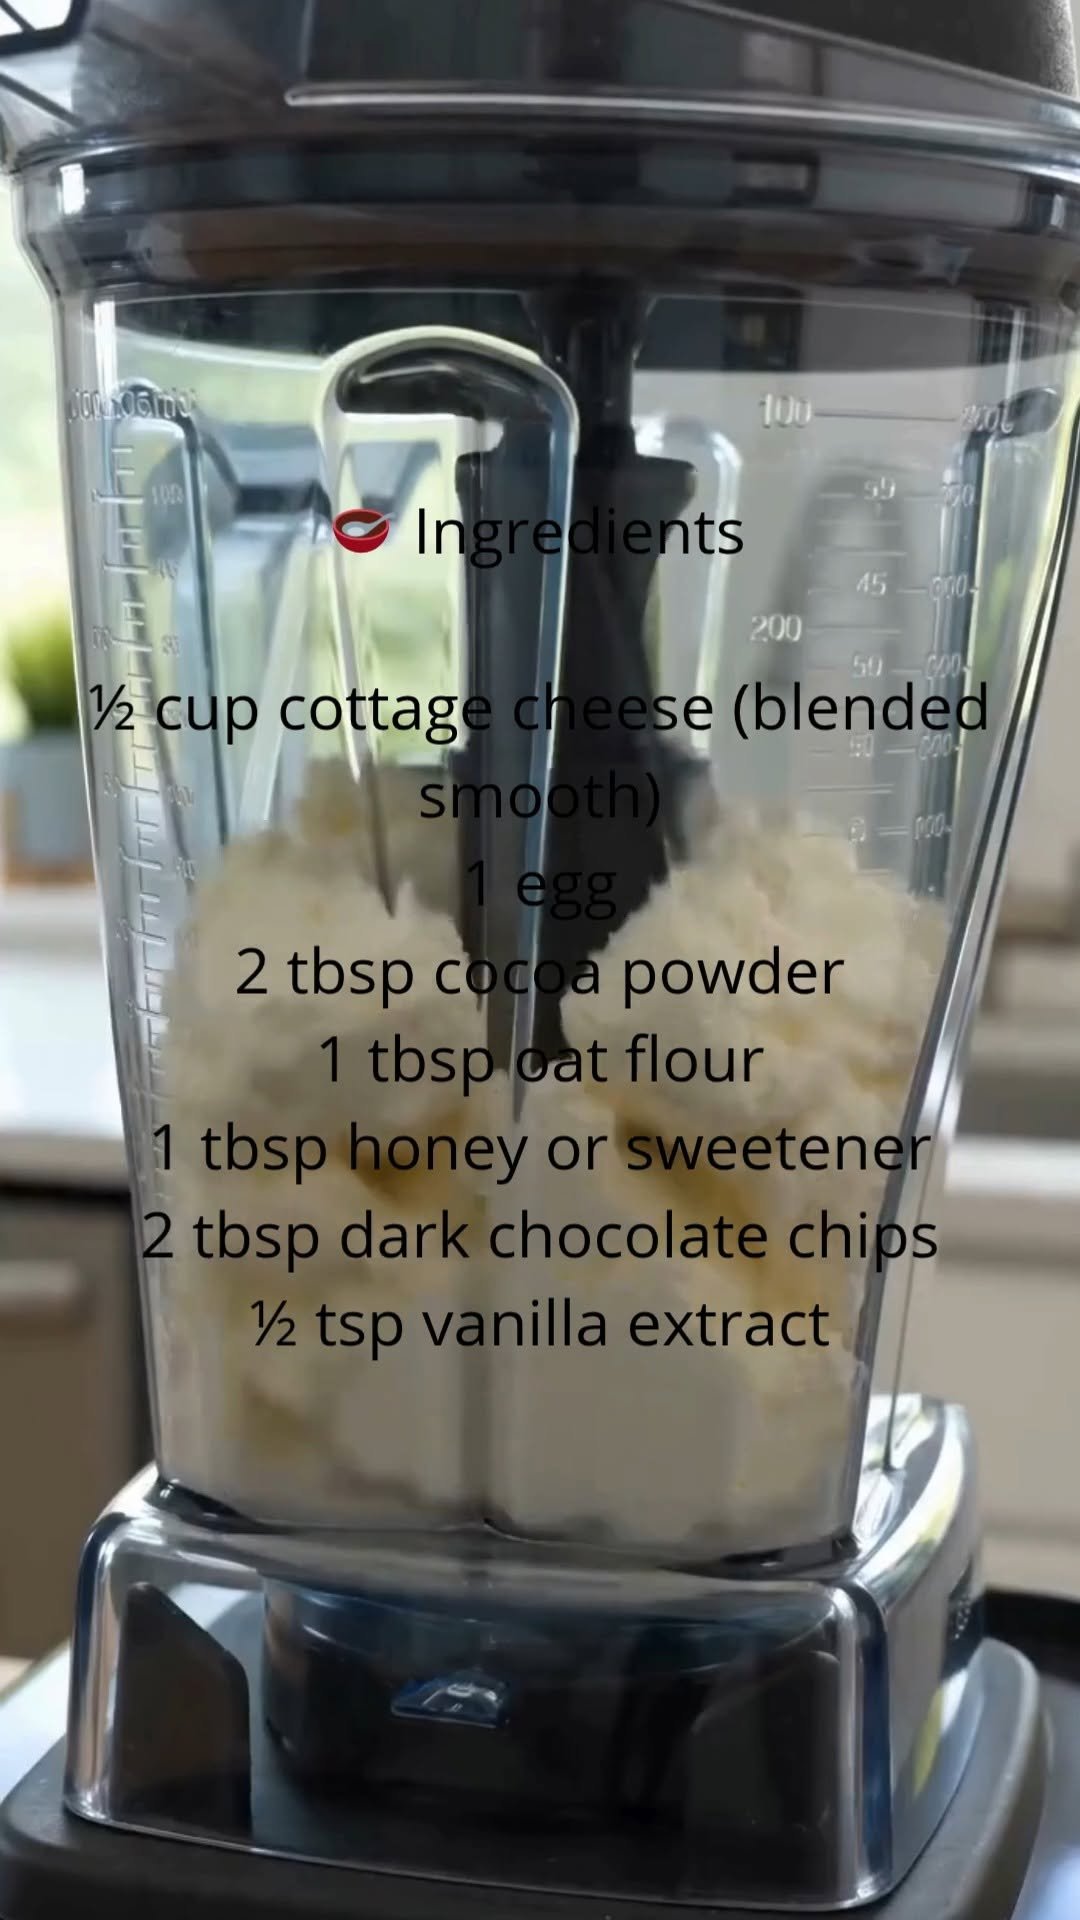
🍫✨ Double Chocolate Fudge Cottage Cheese Mug Cake – Rich, Gooey & Protein-Packed 🥣 Ingredients ½ cup cottage cheese (blended smooth) 1 egg 2 tbsp cocoa powder 1 tbsp oat flour 1 tbsp honey or sweetener 2 tbsp dark chocolate chips ½ tsp vanilla extract 👩🍳 Instructions 1️⃣ Blend the cottage cheese until creamy. 2️⃣ Add the egg, cocoa powder, oat flour, sweetener, and vanilla. Mix until smooth. 3️⃣ Fold in the chocolate chips. 4️⃣ Pour into a microwave-safe mug. 5️⃣ Microwave for 60–90 seconds, until the center is just set. 6️⃣ Let cool for 1 minute before enjoying. ✨ Rich, fudgy, and packed with chocolate flavor while delivering a boost of protein. #ChocolateMugCake #HealthyDessert #ProteinTreat #CottageCheeseRecipes #EasyDesserts #ChocolateLovers #QuickRecipes
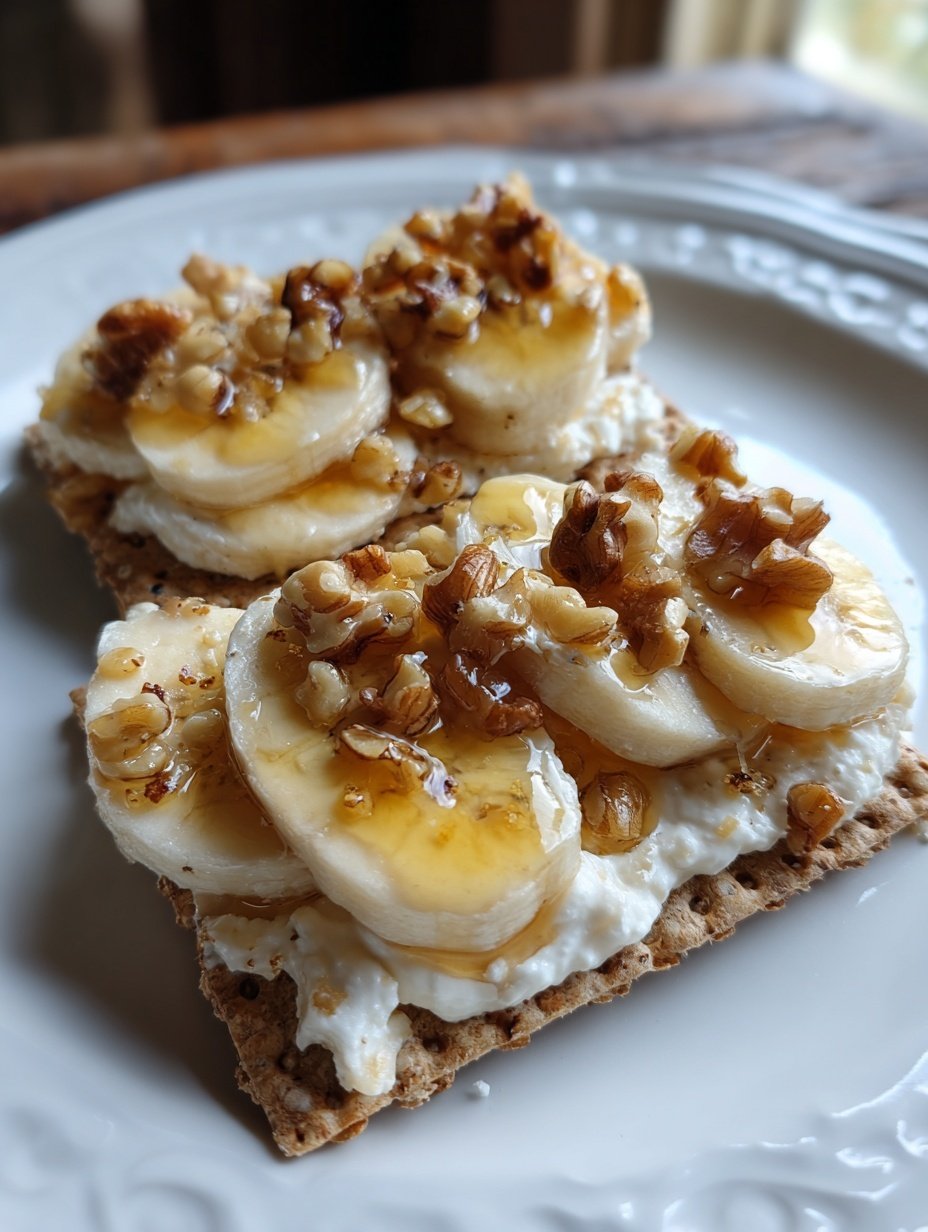
🍌🥜 Banana Nut Cottage Cheese Snack Crackers – Creamy, Crunchy & Naturally Sweet Ingredients (makes about 12 crackers): 1 cup cottage cheese 1 cup whole wheat crackers 1 ripe banana, sliced 1/4 cup chopped walnuts 1 tbsp honey Nutrition info (per 2 crackers): Approx. 110 kcal | 6g protein | 5g fat | 11g carbs Directions Step 1: Prep the Base Spread a small spoonful of cottage cheese evenly onto each whole wheat cracker. Step 2: Add Banana Top each cracker with 1-2 banana slices. Step 3: Add Crunch and Sweetness Sprinkle chopped walnuts over the banana and drizzle lightly with honey. Step 4: Serve Arrange on a plate and enjoy immediately for best texture.

🥜🧀🍪 Peanut Butter Cottage Cheese Snack Crackers – Crunchy, High-Protein & Wholesome Ingredients (makes about 24 crackers): 1 cup cottage cheese 1/2 cup peanut butter 1 cup whole wheat flour Nutrition info (per 6 crackers): Approx. 220 kcal | 12g protein | 12g fat | 18g carbs Directions Step 1: Blend Wet Ingredients In a bowl, mix cottage cheese and peanut butter until smooth and creamy. Step 2: Add Flour Stir in whole wheat flour gradually until a soft dough forms. If too sticky, add a sprinkle more flour. Step 3: Shape and Bake Roll dough into small balls, flatten into cracker shapes on a parchment-lined baking sheet. Bake at 350°F (175°C) for 12-15 minutes until golden. Step 4: Cool & Enjoy Let cool completely for crispiness. Store in an airtight container for up to 5 days.

🥐🧀 High-Protein Cottage Cheese Breakfast Biscuit – Fluffy, Savory & Protein-Packed Ingredients (makes about 8 biscuits): 2 cups cottage cheese 2 cups almond flour 2 eggs 1/4 cup protein powder 1 tsp baking powder 1/2 tsp salt Nutrition info (per biscuit): Approx. 180 kcal | 16g protein | 12g fat | 4g net carbs Directions Step 1: Preheat Oven Preheat oven to 350°F (175°C) and line a baking sheet with parchment paper. Step 2: Mix Wet Ingredients In a bowl, blend cottage cheese and eggs until smooth using a hand mixer or blender. Step 3: Add Dry Ingredients Stir in almond flour, protein powder, baking powder, and salt until a thick dough forms. Step 4: Bake & Enjoy Scoop dough into 8 mounds on the baking sheet, flatten slightly, and bake for 20-25 minutes until golden. Cool slightly before serving.
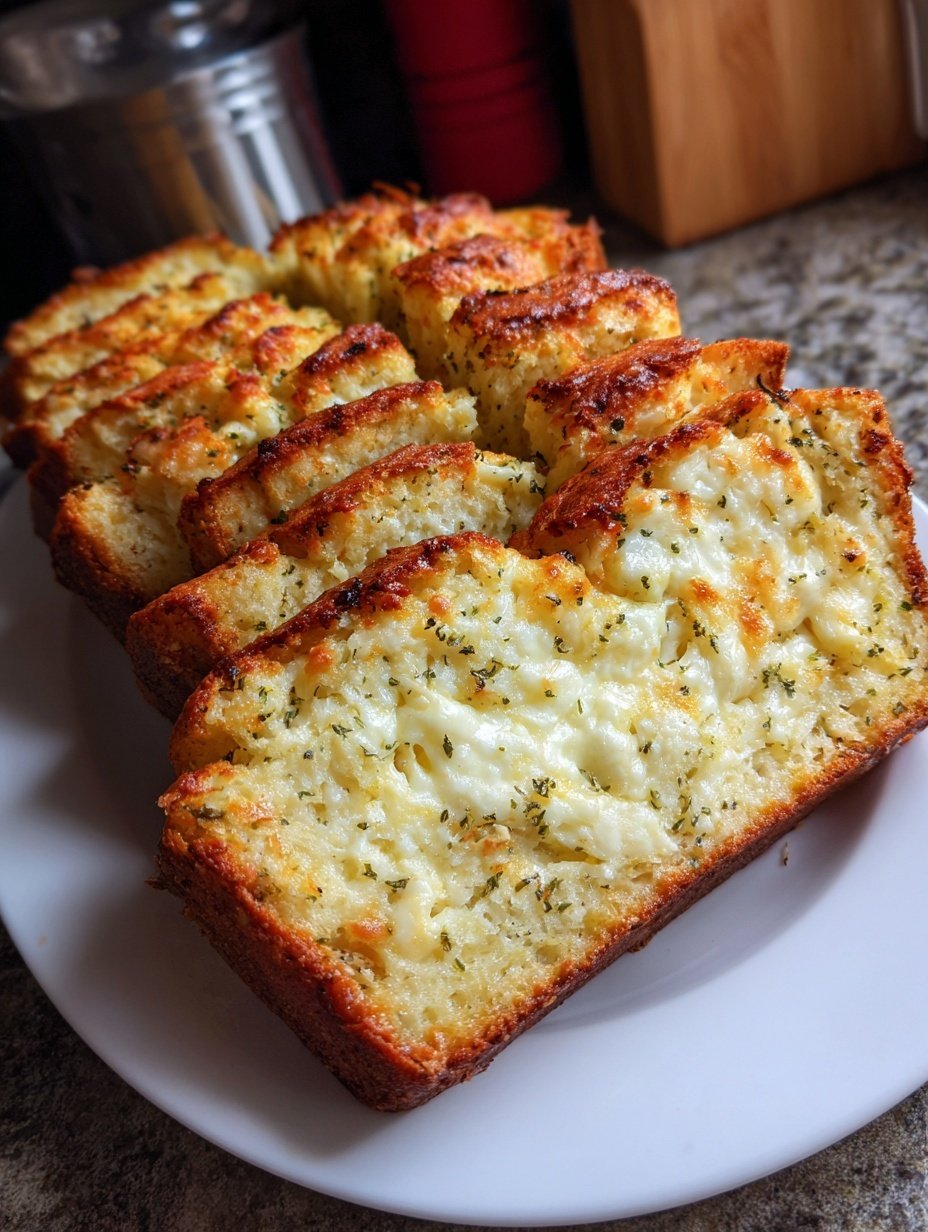
🥖🧀 Keto Cottage Cheese Cheese Bread – Low-Carb, High-Protein & Cheesy Ingredients (makes about 8 slices): 1 cup cottage cheese 4 oz cream cheese 3 large eggs 1 cup shredded mozzarella cheese 1/2 cup almond flour 1 tsp baking powder 1/2 tsp garlic powder salt and pepper to taste Nutrition info (per slice): Approx. 145 kcal | 12g protein | 11g fat | 2g net carbs | Keto-friendly Directions Step 1: Preheat and Prep Preheat oven to 350°F (175°C). Grease a small loaf pan or line with parchment. Step 2: Blend Wet Ingredients In a blender or food processor, combine cottage cheese, cream cheese, and eggs until smooth. Step 3: Add Dry Ingredients Add mozzarella, almond flour, baking powder, garlic powder, salt, and pepper. Blend until fully mixed. Step 4: Bake and Cool Pour batter into pan. Bake 35-40 minutes until golden and set. Cool before slicing.
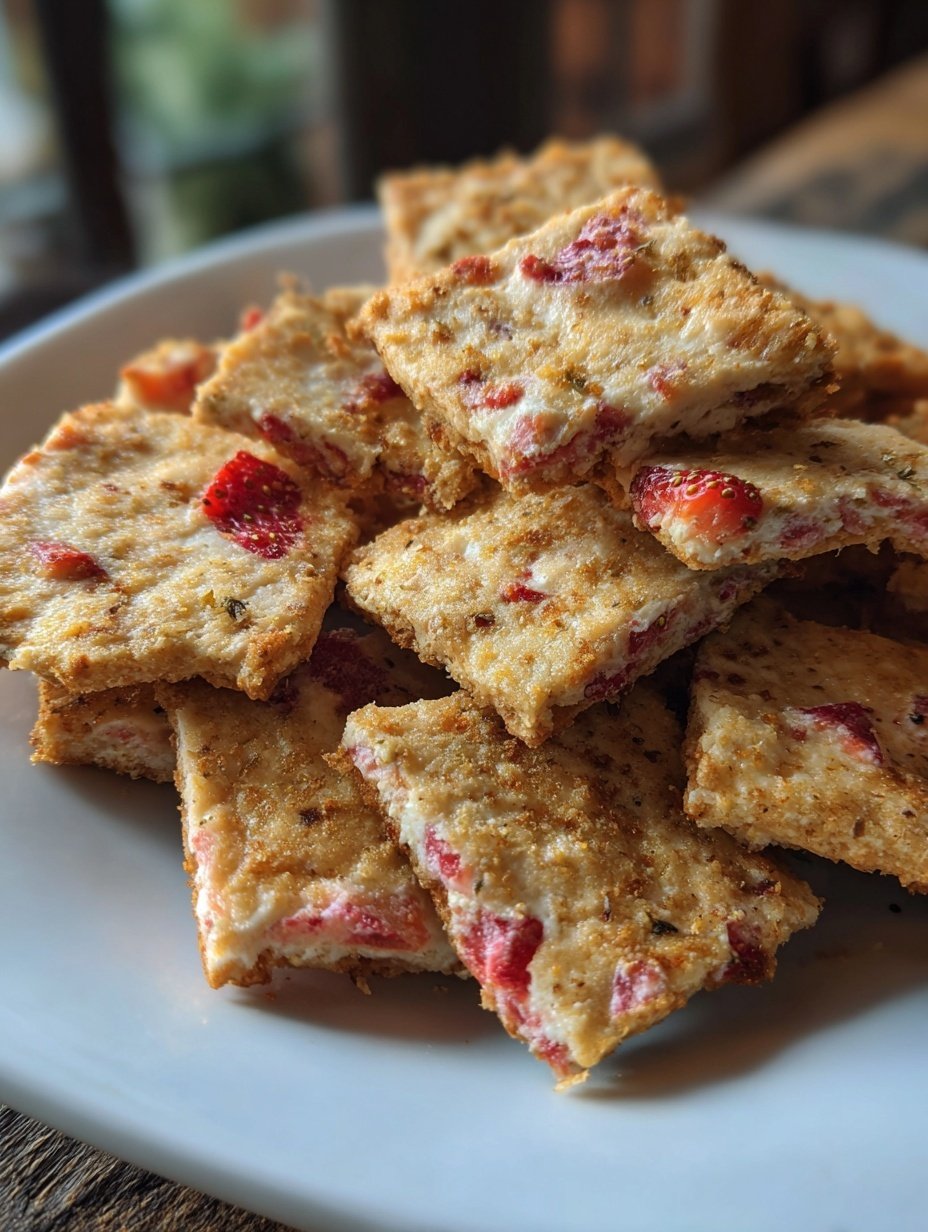
🍓🧀 Strawberry Cottage Cheese Snack Crackers – Crispy, High-Protein & Berry-Flavored Ingredients (makes about 20 crackers): 1 cup cottage cheese 1/2 cup freeze-dried strawberries 1 cup almond flour 1 egg 1/4 tsp salt Nutrition info (per 5 crackers): Approx. 140 kcal | 10g protein | 9g fat | 5g net carbs | Low-carb & gluten-free Directions Step 1: Prep the Mixture In a food processor or blender, pulse cottage cheese, freeze-dried strawberries, egg, and salt until smooth. Step 2: Add Almond Flour Transfer to a bowl, stir in almond flour until a thick dough forms. Let rest 5 minutes. Step 3: Shape & Bake Roll dough between parchment sheets to 1/8-inch thick, cut into 20 crackers. Bake at 350°F (175°C) on parchment-lined sheet for 12-15 minutes until golden. Step 4: Cool & Crisp Cool completely on a rack for crisp texture. Store in airtight container up to 5 days.
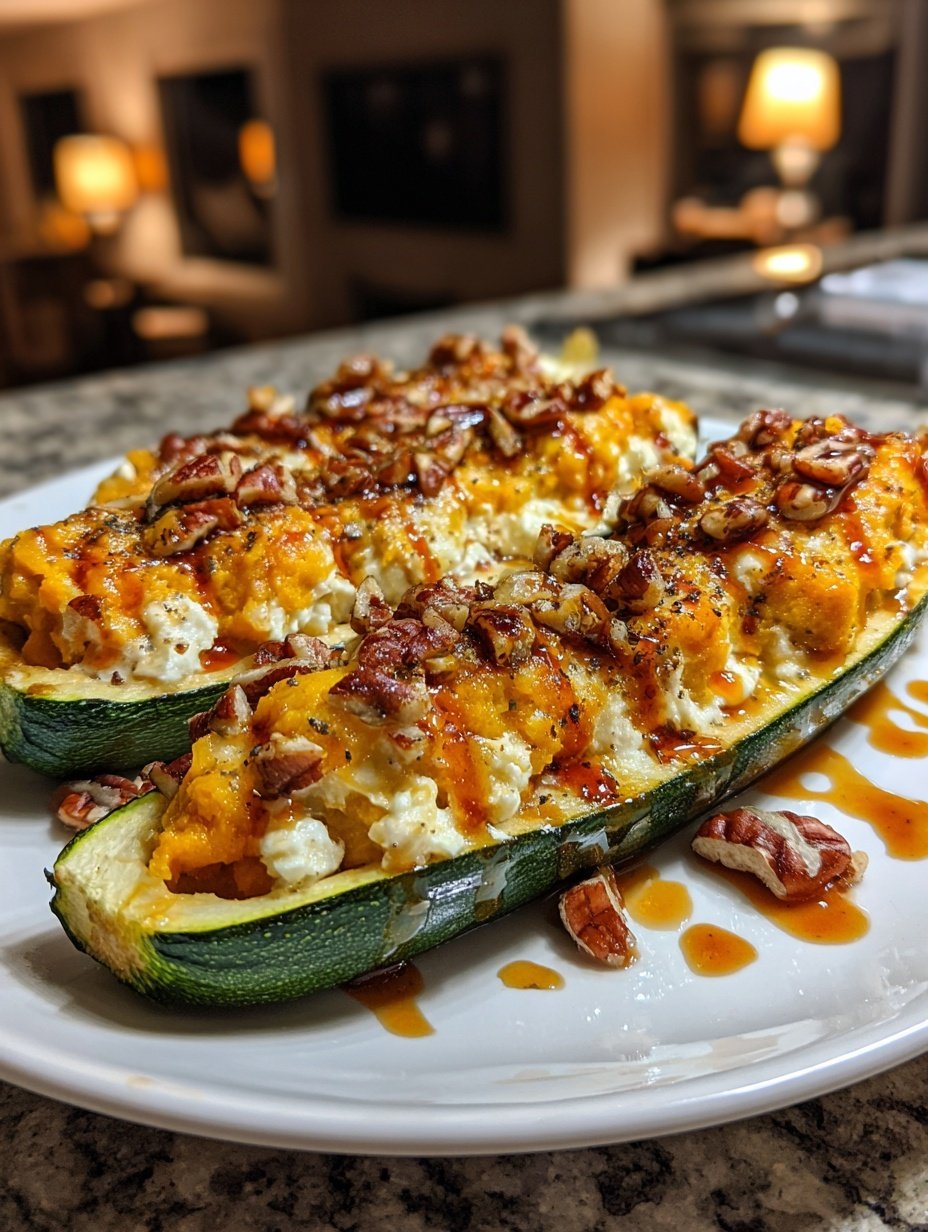
🍁🧀 Pumpkin Spice Stuffed Zucchini Boats with Cottage Cheese – Cozy, Creamy & Fall-Flavored Ingredients (makes about 4 boats): 4 medium zucchini 1 cup pumpkin puree 1/2 cup cottage cheese 2 tbsp maple syrup 1 tsp pumpkin pie spice 1/4 cup chopped pecans 1/4 cup shredded mozzarella cheese salt and pepper to taste Nutrition info (per boat): Approx. 180 kcal | 9g protein | 10g fat | 15g net carbs | High in fiber & vitamins Directions Step 1: Prep the Zucchini Halve zucchini lengthwise, scoop out centers with a spoon, and lightly salt insides. Place cut-side up on a baking sheet. Step 2: Make the Filling In a bowl, mix pumpkin puree, cottage cheese, maple syrup, pumpkin pie spice, pecans, salt, and pepper until smooth. Step 3: Stuff and Bake Fill zucchini halves with pumpkin mixture, top with mozzarella, and bake at 375°F (190°C) for 25-30 minutes until tender. Step 4: Serve Let cool slightly, garnish with extra pecans if desired, and enjoy warm!